Touring the Tests
When we write Android apps, a chunk of our time is spent testing those apps. Some of that testing is manual: poking at the UI and seeing if everything works as expected. But some of that testing is automated, with test classes that test our “real” classes and confirm that everything is OK.
With that in mind, let’s take a look at the types of tests that we have in the starter project and how to run them.
Instrumented Tests
There are two major types of test in an Android app:
- Instrumented tests, which run in Android on a device or emulator
- Unit tests, which run on your development machine or similar places
Unit tests run much faster, but they cannot test as much, because they do not have access to everything inside of Android. For example, while we could test our ability to talk to a Web service from unit tests, we cannot test our ability to get GPS locations using Android APIs from unit tests. For those, we need instrumented tests. Similarly, most automated UI testing needs instrumented tests, as the Android UI system is only really available in Android.
Since they are more flexible, and since test speed only becomes a major issue with larger projects, let’s focus first on instrumented tests.
Where They Run
As noted above, instrumented tests will run on an Android device or emulator. For your own personal test runs, you can use the same devices or emulators that you use for manually running the app.
Projects that employ continuous integration (CI) servers will need to configure them to support running tests on server-hosted emulators. Some hosted CI services — such as CircleCI — have that capability readily available to you. For self-hosted CI servers, there should be recipes available to teach you how to configure them for Android app testing.
What You Can Test
Because you are running the tests in an actual Android environment, you can test anything that you want. You have the full Android SDK at your disposal.
However, from a practical standpoint, there will be limits as to what you can test:
- Emulators do not emulate everything about hardware. For example, you will not be able to test readings that you get from nearby cell towers, as an emulator is not in communication with any actual cell towers.
- You want your tests to be repeatable. Hence, even on hardware, you may need to limit testing what you really get from the hardware, as you do not control that hardware and what it might return. For example, while in theory you could test getting actual location data via GPS from a device, you cannot guarantee the precise values that will get returned, as GPS is inexact by its very nature.
- Any given device has one set of hardware characteristics. Any given emulator will mimic one set of hardware characteristics. Testing things that vary based on hardware characteristics will require multiple test runs across a fleet of devices or emulators that will reflect the varying characteristics.
What the Starter Project Has
The starter project not only has a “hello, world” sort of UI for you, but it has a similar instrumented test set up, ready for you to run.
The androidTest Source Set
As we saw earlier in the book, instrumented test code resides in an androidTest/ directory. This is a peer to the main/ directory that contains your “real” application code. androidTest/ is a “source set” that will be used only when running instrumented tests. The stuff in the androidTest/ source set will not be included in your app when you ship it.
The Test Class
Inside of there you will find a java/ directory, with a Java package matching the application ID of your app, and an ExampleInstrumentedTest Java or Kotlin file.
When you create a new project, and you choose whether or not to have Kotlin support, that choice will determine not only whether your MainActivity is in Java or Kotlin, but also whether your test code is in Java or Kotlin.
The Kotlin class is fairly short:
package com.commonsware.jetpack.hello

import androidx.test.platform.app.InstrumentationRegistry
import androidx.test.ext.junit.runners.AndroidJUnit4

import org.junit.Test
import org.junit.runner.RunWith

import org.junit.Assert.*

/**
 * Instrumented test, which will execute on an Android device.
 *
 * See [testing documentation](http://d.android.com/tools/testing).
 */
@RunWith(AndroidJUnit4::class)
class ExampleInstrumentedTest {
  @Test
  fun useAppContext() {
    // Context of the app under test.
    val appContext = InstrumentationRegistry.getInstrumentation().targetContext
    assertEquals("com.commonsware.jetpack.hello", appContext.packageName)
  }
}
The Java equivalent is not much longer:
package com.commonsware.jetpack.hello;

import android.content.Context;
import androidx.test.platform.app.InstrumentationRegistry;
import androidx.test.ext.junit.runners.AndroidJUnit4;

import org.junit.Test;
import org.junit.runner.RunWith;

import static org.junit.Assert.*;

/**
 * Instrumented test, which will execute on an Android device.
 *
 * @see <a href="http://d.android.com/tools/testing">Testing documentation</a>
 */
@RunWith(AndroidJUnit4.class)
public class ExampleInstrumentedTest {
  @Test
  public void useAppContext() {
    // Context of the app under test.
    Context appContext =
      InstrumentationRegistry.getInstrumentation().getTargetContext();
    assertEquals("com.commonsware.jetpack.hello", appContext.getPackageName());
  }
}
The Annotations
The Java and Kotlin editions of the test class are equivalent, other than language syntax.
Both have a single class, named ExampleInstrumentedTest, annotated with a @RunWith(AndroidJUnit4::class) annotation. Android presently uses JUnit 4 for instrumented tests. This annotation tells JUnit — and, more importantly, some Android Studio stuff for running tests — that this class contains test code that should be run as part of an instrumented test.
Both editions of ExampleInstrumentedTest have one method (or function, in Kotlin). It is called useAppContext(), and it is marked with the @Test annotation. A test class can contain one or more of these @Test methods/functions. When it comes time to run the tests, Android Studio will:
- Create an instance of your test class
- Call one of the
@Testmethods/functions on that instance - Create another instance of your test class
- Call another of the
@Testmethods/functions on that new instance - And so on, until all of the
@Testmethods/functions have been executed
The Test Code
So… what is useAppContext() testing?
In truth, it is not testing very much.
We will explore what a Context is a bit later in the book. For the moment, take it on faith that this code is:
- Finding out what our application ID is, by calling
getPackageName()on aContext - Confirming whether it matches the expected value of
com.commonsware.jetpack.hello
assertEquals() is supplied by JUnit 4 and will fail the test if the two values are not equal.
We will explore much more about JUnit 4 and how to write more elaborate tests much later in the book.
How You Run Them
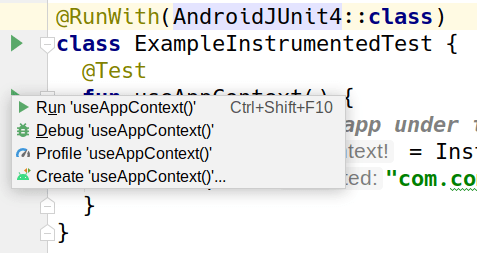
For a single test method or function, you will notice a triangle-pair “run” icon in the “gutter” area of the code editor:
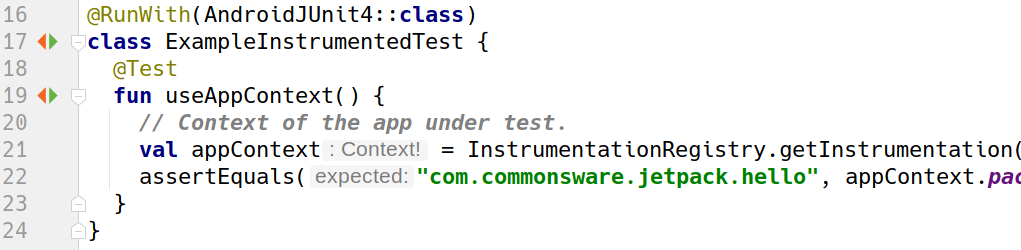
Clicking that will allow you to run that individual test method/function. Or, optionally, you will be able to debug that test method.
Similarly, there is a “run” icon in the gutter next to the class name, to run all of the test functions in the Kotlin test class. For a Java class, the class-level test icon is a “double-run” pair of overlapping green triangles:
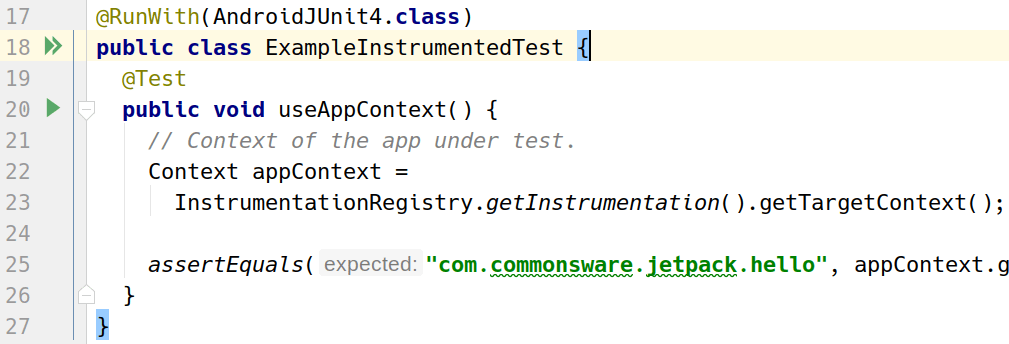
(Why is there a difference? Ask Google.)
For smaller projects, those may suffice. For larger projects, you can set up a custom “run configuration” that can run all of the instrumented tests in your project, for example. We will see this much later in the book.
What the Test Results Look Like
When you run a test method or a test class, rather than focusing on the output in the emulator or device, you will focus instead on the “Run” view in Android Studio. This will show you which tests succeeded and which tests failed.
The nice people who created Android Studio elected to write tests that succeed, and Android Studio’s output will reflect that:
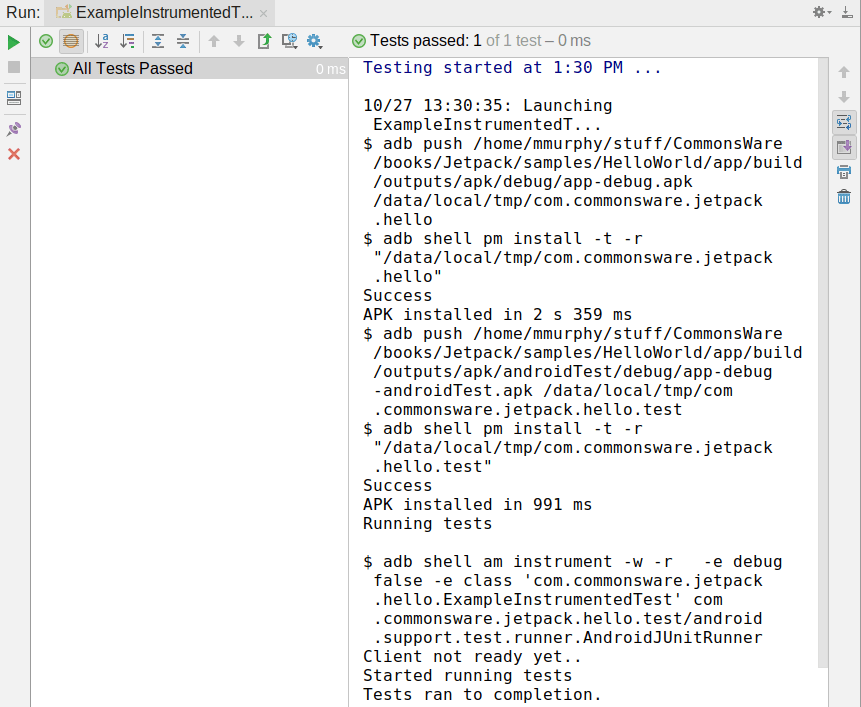
Note the “All Tests Passed” message with the green checkmark-in-circle icon.
If a test fails — such as a modified version of the sample’s test class that compares the application ID to this.is.wrong — you will see the failed test in a tree on the left and details of what went wrong on the right:
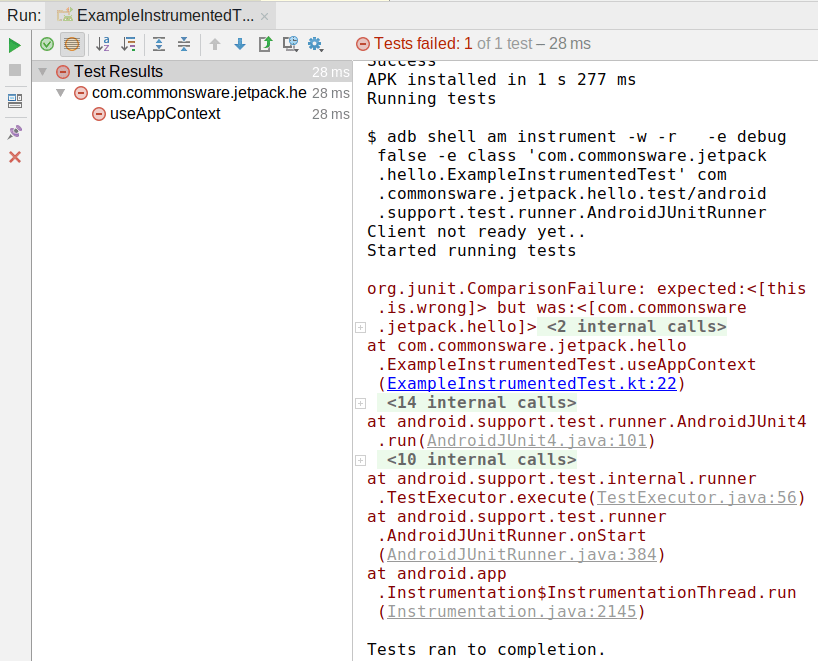
JUnit assertions, such as assertEquals(), will provide some details as to what went wrong, shown in a stack trace in the test output:
org.junit.ComparisonFailure: expected:<[this.is.wrong]> but was:<[com.commonsware.jetpack.hello]>
Here, we see that we expected this.is.wrong, but we instead got com.commonsware.jetpack.hello, and so the test failed.
About That testInstrumentationRunner
Back in the chapter on Gradle, we saw this line in the defaultConfig closure:
testInstrumentationRunner "androidx.test.runner.AndroidJUnitRunner"
The testInstrumentationRunner indicates what code should be used to execute the JUnit tests themselves. The runner shown here is the standard runner for instrumented tests. Various third-party testing tools might have you replace this value with some class from their library, so this is not always the test runner that we use.
The androidTestImplementation Dependencies
Such a library would also show up as an androidTestImplementation dependency in the list of dependencies for the module. We have a couple of those already:
  androidTestImplementation 'androidx.test.ext:junit:1.1.3'
  androidTestImplementation 'androidx.test.espresso:espresso-core:3.4.0'
The one that is really required is androidx.test:runner. This is the library that supplies the AndroidJUnitRunner class and other core classes for writing and running our instrumented tests.
The other one is androidx.test.espresso:espresso-core. This is the core of Espresso, a powerful library for writing GUI tests. However, our existing instrumented test does not actually use Espresso, so this particular dependency is unnecessary at the moment. We will cover Espresso much later in the book.
Prev Table of Contents Next
This book is licensed under the Creative Commons Attribution-ShareAlike 4.0 International license.