Elements of Navigation
There are four main pieces of the Navigation component:
- The navigation resources
- The Android Studio editor for those resources
- The
NavHostFragmentfor intra-activity navigation between fragments - The
NavControllerthat lets you navigate at runtime
Navigation Resources
Google only infrequently creates a new type of resource, and almost never do they create one that is not handled directly by the OS.
For the Navigation component, they did just that.
You can have a res/navigation/ directory in your module that holds navigation resources. Those are XML files with a root <navigation> element and a series of child elements that describe the navigation graph of your app.
Principally, the Navigation component handles navigation between fragments within an activity. Hence, the primary children of the <navigation> element are <fragment> elements, identifying a particular fragment that is part of the navigation graph. However, if you want to navigate to a different activity — perhaps one that has its own navigation graph — you can have child <activity> elements off of <navigation> that identify those.
The <fragment> and <activity> elements — otherwise known as the “destinations” — have a number of possible child elements, of which two are the most important:
-
<action>indicates a destination that is supported from this screen; the Navigation component helps you navigate based on these actions -
<argument>indicates a particular bit of data that this screen is expecting as input
The root <navigation> element will have an app:startDestination attribute that identifies which <fragment> should be displayed when this navigation graph is used by an activity.
We will explore all of these in greater detail when we work through a sample app a bit later in the chapter.
Navigation Resource Editor
You are welcome to maintain navigation resources manually by editing the XML. Or, you can use Android Studio’s dedicated editor for those resources.
As with layout and menu resources, the navigation editor is a visual drag-and-drop editor, or you can work with the XML directly.
Destinations
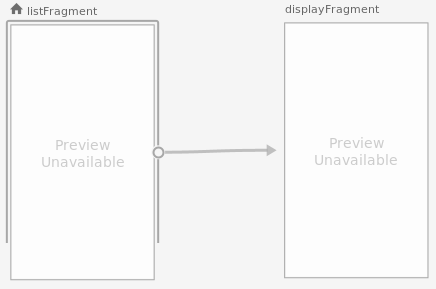
The main “preview” area shows the existing destinations in the navigation graph:
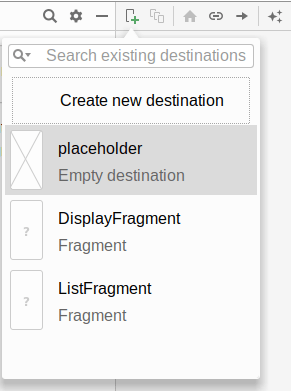
To add a new destination, you can click the left-most toolbar button in the preview area:

This will bring up a list of all of the activities and fragments in your module, along with options for a “placeholder” and “create new destination”. The latter brings up a new-fragment wizard to help you create a new fragment.
If you click on a particular destination, the “Attributes” pane will show you key information about that destination, much of which is editable:
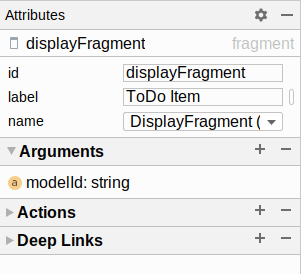
Of particular note:
- “ID” holds the unique identifier of this destination. This uses the same
@+id/syntax as is used in layout and menu resources, though in the editor we drop off that prefix. So, while the editor may showdisplayFragment, the real identifier in the XML is@+id/displayFragment. - “Class” is the Java/Kotlin class that implements this fragment or activity
- “Label” will be used in places where the Navigation component shows a user-readable name for the destination, such as in the app bar (e.g., a
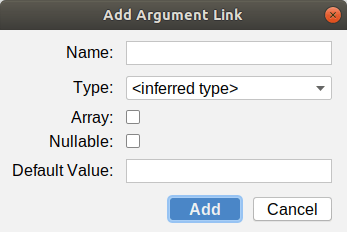
Toolbar) - “Arguments” contains a list of the arguments that this particular destination expects to receive as input. The
+button allows you to add a new argument:
In the preview area toolbar, you can click the “home” icon to designate the selected destination as being the start destination for this navigation graph.
Actions
Arrows connecting destinations in the preview area represent actions. Reminiscent of constraining widgets in a ConstraintLayout, you can drag a circle on the right edge of a destination to a corresponding circle on the left edge of another destination to create an action. This indicates that you want to be able to navigate from the first destination to the second.
Clicking on an arrow highlights it in blue and brings up its own set of attributes:
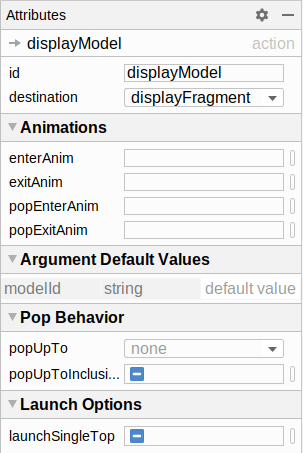
Of particular note:
- Actions have their own “ID” value, once again using the same
@+id/syntax that we have seen elsewhere - “Destination” provides the ID of the destination that is the target of this action (i.e., the destination that will be navigated to if this action is performed)
- “Argument Default Values” allows you to optionally supply hard-coded values for arguments required by the chosen destination, instead of having to provide them in Java/Kotlin code
NavHostFragment
As noted earlier, the primary focus of the Navigation component is to navigate between fragments within an activity. This implies that the Navigation component knows where those fragments should go.
That is in the form of a NavHostFragment. This is a fragment that shows other fragments, the ones specified in your navigation graph. You tell it what navigation graph it should use, and it will be responsible for:
- Showing your start destination, and
- Switching to another fragment destination, when your code asks for that at runtime
NavController
Switching to another destination in your navigation graph at runtime involves a NavController. This will be associated with the activity or fragment that is hosting the NavHostFragment. There are utility functions for getting the NavController, and from there you can ask it to move forwards or backwards in the navigation graph. “Forwards” means “go to this destination”; “backwards” means “go back to where we came from to get to our current destination”.
Prev Table of Contents Next
This book is licensed under the Creative Commons Attribution-ShareAlike 4.0 International license.