Generating a Report
Right now, our to-do information is held in a SQLite database, whose contents are viewable via the app. This is fine, as far as it goes… but it does not go very far. We have no good means of getting this information to any other device or any other person.
In the next two tutorials, we will work on some options for doing just that. In this tutorial, we will generate a simple Web page containing our to-do list, filtered by whatever filter mode we have applied. That Web page will be saved in a location specified by the user, and we will view the Web page in a Web browser when we are done.
This is a continuation of the work we did in the previous tutorial. The book’s GitLab repository contains the results of the previous tutorial as well as the results of completing the work in this tutorial.
Step #1: Adding a Save App Bar Item
It’s time for another app bar item! This time, though, it uses an existing icon and string resource, as we already have a “save” app bar item in the EditFragment. We will reuse that for a “save” app bar item in the RosterListFragment.
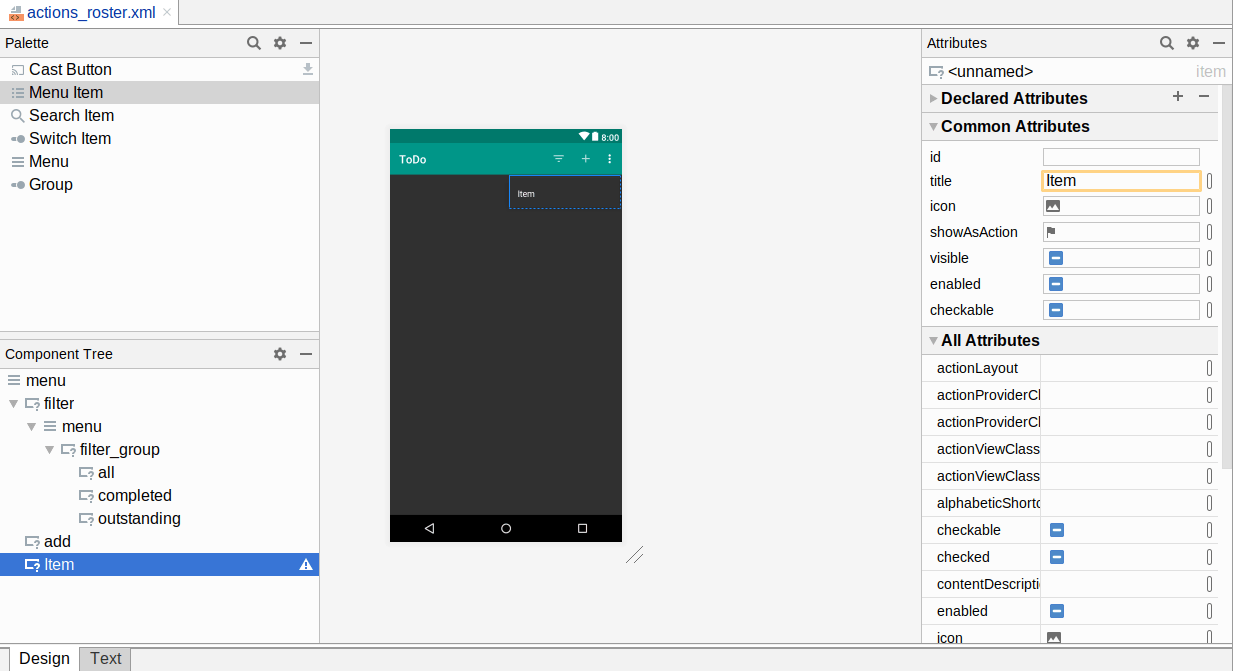
Open up the res/menu/actions_roster.xml resource file, and switch to the graphical designer. Drag a “Menu Item” from the “Palette” view into the Component Tree, slotting it after the existing “add” item:

In the Attributes view for this new item, assign it an ID of save. Then, choose both “ifRoom” and “withText” for the “showAsAction” option. Next, click on the “O” button next to the “icon” field. This will bring up an drawable resource selector. Click on ic_save in the list of drawables, then click OK to accept that choice of icon.
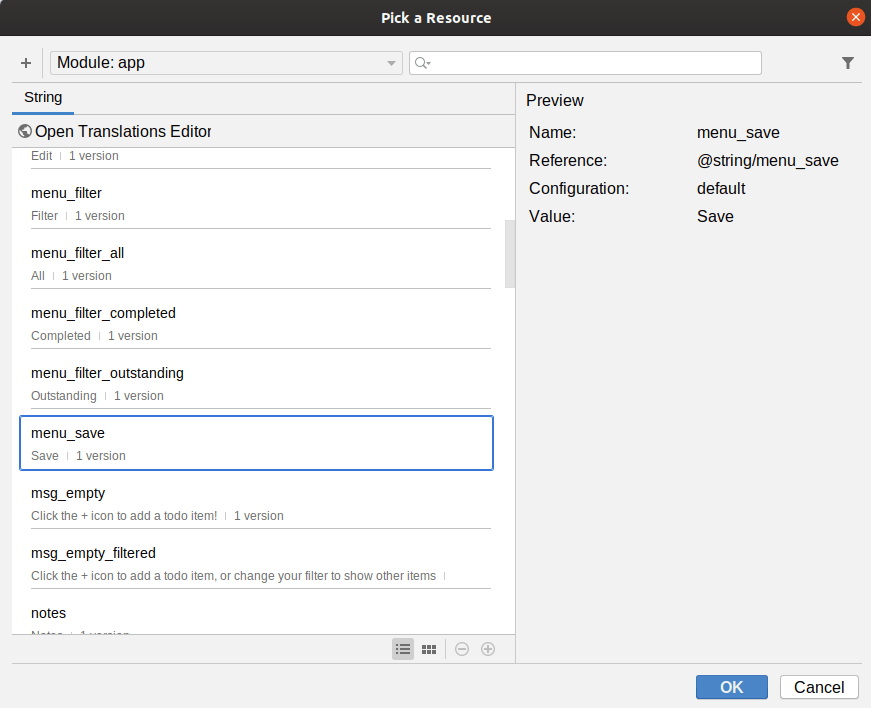
Then, click the “O” button next to the “title” field. As before, this brings up a string resource selector. This time, we actually have a menu_save string resource in the selector:

Double-click on it to choose it and complete configuration of our app bar item.
Prev Table of Contents Next
This book is licensed under the Creative Commons Attribution-ShareAlike 4.0 International license.