Step #4: Launching the EditFragment for Adds
Next, we need to add some logic to do some work when the user taps that “add” app bar item. Specifically, we want to navigate from the RosterListFragment to the EditFragment… but do so in a way that tells the EditFragment that we should be adding a new to-do item, not editing an existing one.
Right now, to navigate to the EditFragment, we need to provide a modelId value, identifying the existing to-do item to be edited. In this case, though, we do not have an existing to-do item — we want to create a new one. So, we can change the navigation graph to allow modelId to support null as a value. Then, we can have a null modelId indicate that we are creating a new to-do item, while a non-null modelId would indicate that we are editing an existing to-do item.
With all that in mind, open res/navigation/nav_graph.xml, and click on the editFragment destination. In the “Attributes” pane, we have our modelId argument. Double-click on it to bring up a dialog to update its configuration:
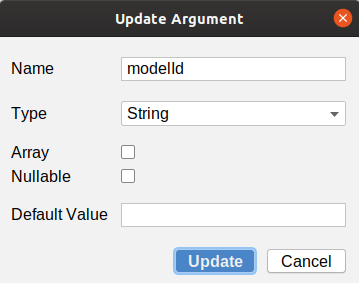
Check the “Nullable” checkbox, then click Update to close the dialog.
Next, click on the rosterListFragment destination. Using the circle on the right edge, drag a new action, connecting it to editFragment. When you have done that, you may want to click the toolbar button that looks like… well… plusses or stars or something. It will “auto-arrange” the destinations to help make the actions more visible:
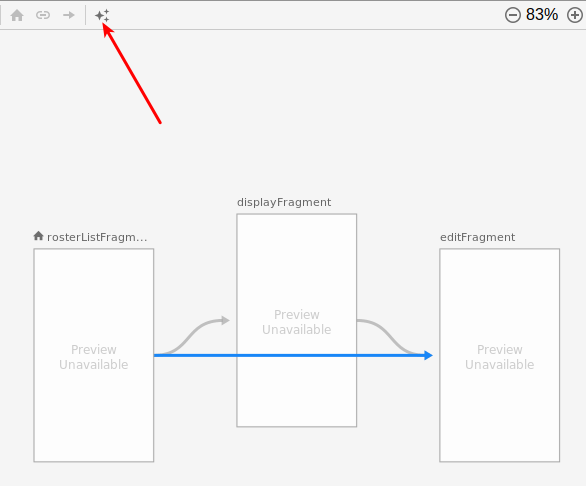
In the “Attributes” pane for this new action, set the ID to createModel. Then, there should be an “Argument Default Values” section, showing modelId. Fill in @null in the “default value” field, where @null means “no, I really mean null, and not the string "null"”.
From the Android Studio main menu, choose “Build” > “Make Module ‘app’” to get Android Studio to generate fresh Safe Args code for our navigation resource.
Next, add this add() function to RosterListFragment:
  private fun add() {
    findNavController().navigate(RosterListFragmentDirections.createModel(null))
This does the same sort of thing as display(), except that it uses the createModel() action instead of the displayModel() action.
Then, add this onOptionsItemSelected() function to RosterListFragment:
  override fun onOptionsItemSelected(item: MenuItem): Boolean {
    when (item.itemId) {
      R.id.add -> {
        add()
        return true
      }
    }

    return super.onOptionsItemSelected(item)
If the user clicks the add app bar item, we call the add() function.
If you run the app and click the new “Add” action bar item… you should crash. Specifically, you will get an error from Kotlin, complaining that something was null but was declared to be not-null.
That error is coming from this line in SingleModelMotor:
private val modelId: String
We declared this constructor parameter as taking String, and that used to work. But now we allow our modelId to be null to represent the case where we are creating a new model. To fix that, change that parameter to be String? instead of String:
class SingleModelMotor(
  private val repo: ToDoRepository,
  private val modelId: String?
) : ViewModel() {
That, in turn, gives you an error in the getModel() function, as find() on ToDoRepository is set to take a String parameter, not String?. So, adjust find() on ToDoRepository to take String? instead:
fun find(modelId: String?) = items.find { it.id == modelId }
The implementation of find() does not need to change; it will simply return null when none of the items matches the null ID.
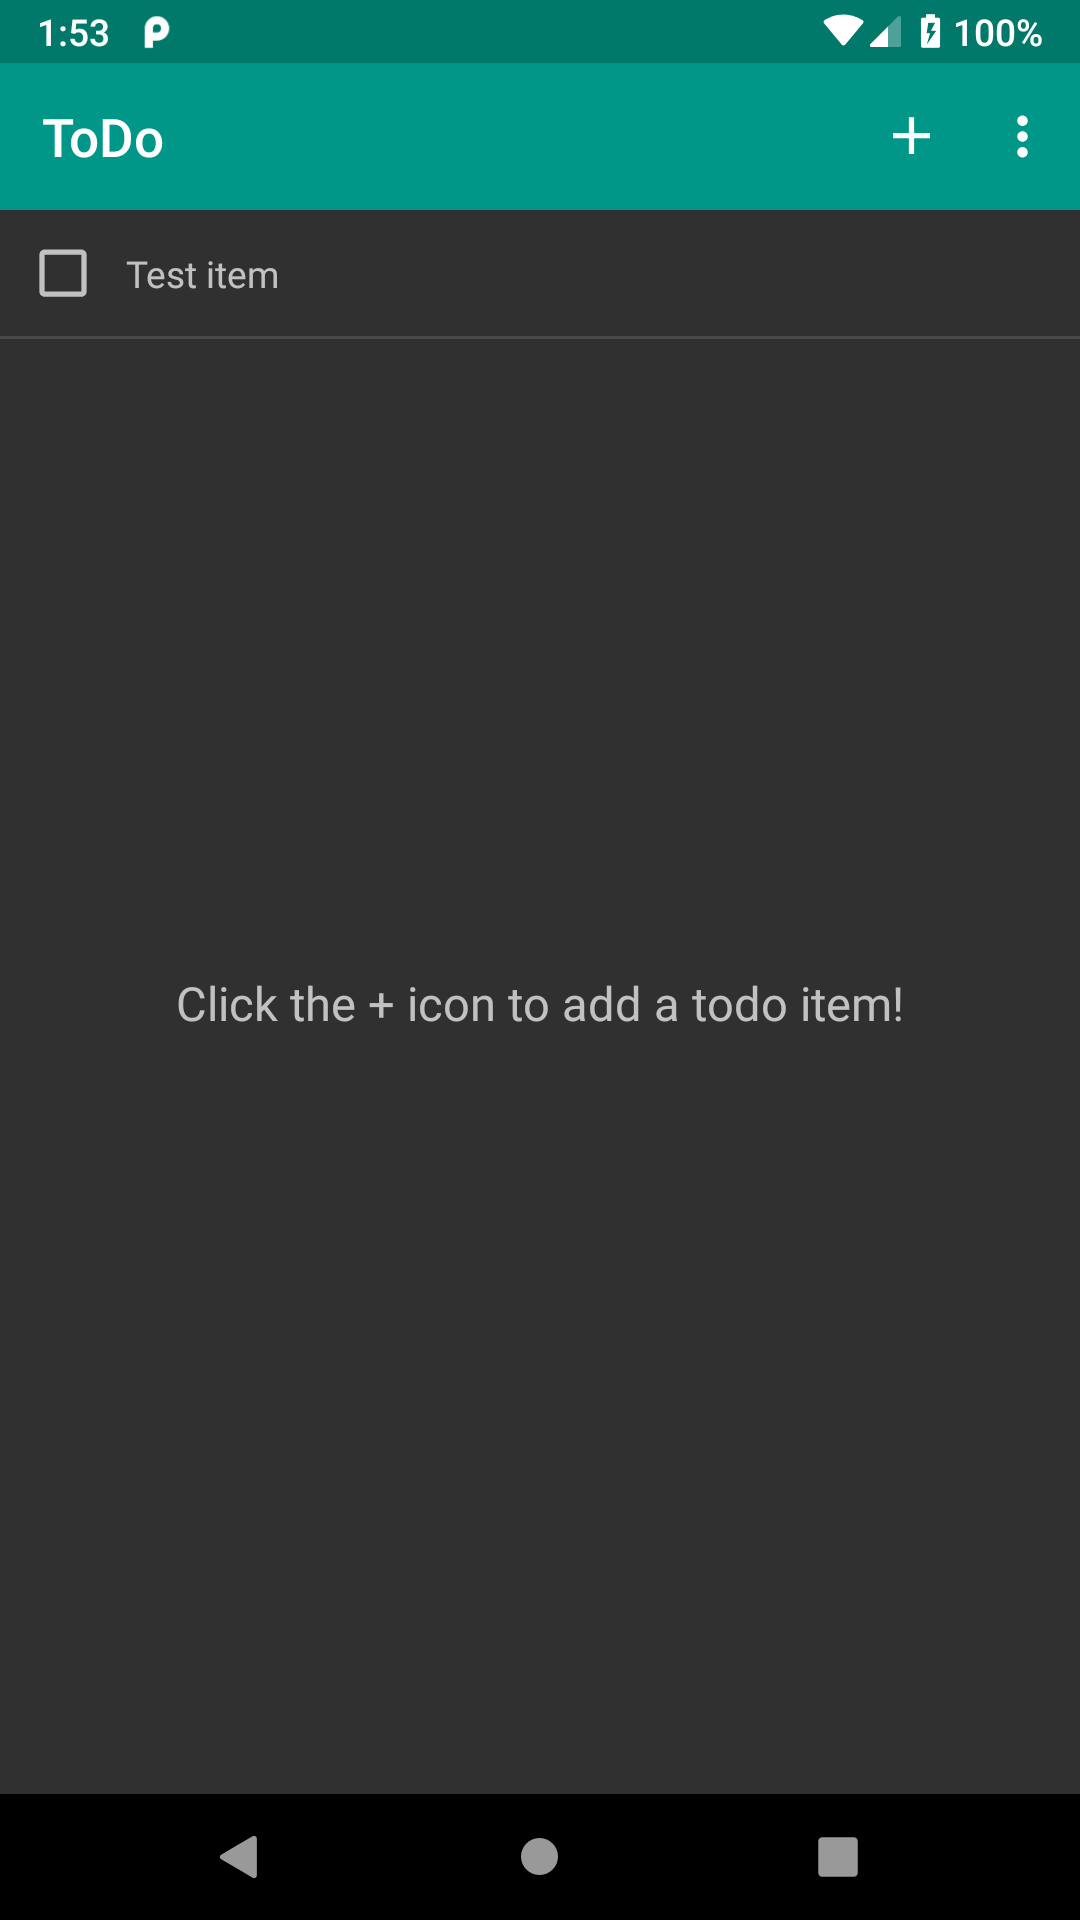
Now, if you run the app and click the “add” app bar item, you should get an empty EditFragment form, showing our hints for the description and notes fields:

If you run the sample app, click the “add” app bar item, fill in the form, and click the “save” app bar item, you wind up seeing the list of to-do items… with the empty text still visible:
Prev Table of Contents Next
This book is licensed under the Creative Commons Attribution-ShareAlike 4.0 International license.