Setting Up an Activity
Of course, it would be nice if that “About” menu item that we added in a previous tutorial actually did something.
We could set up another fragment, and have that be displayed when the user clicked “About”. However, we have a few other fragments to set up, so we will have plenty of opportunities to learn about fragments. Besides, we do not want you to get bored.
So, in this tutorial, we will define another activity class, one that will be responsible for the “about” details. And, we will arrange to start up that activity when that menu item is selected. While in modern Android app development you would not need a full activity to display an “about” screen, there may be times when you really do need another activity, so this will show you how to set one up.
This is a continuation of the work we did in the previous tutorial. The book’s GitLab repository contains the results of the previous tutorial as well as the results of completing the work in this tutorial.
 You can learn more about having multiple activities in the "Implementing Multiple Activities" chapter of Elements of Android Jetpack!
Step #1: Creating the Stub Activity Class and Manifest Entry
First, we need to define the Kotlin class for our new activity, AboutActivity. We could just create a new empty class, but the Android Studio new-activity wizard is not bad, so we will use it.
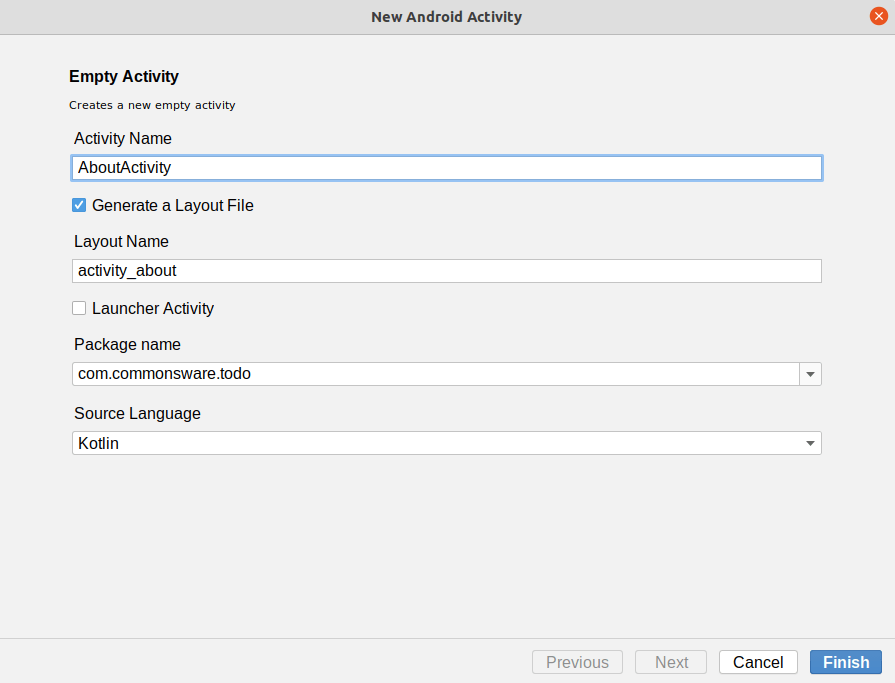
Right-click on your main/ source set directory in the project explorer, and choose “New” > “Activity” > “Empty Activity” from the context menu. This will bring up a new-activity wizard:
Fill in AboutActivity in the “Activity Name” field. Leave “Launcher Activity” unchecked. If the package name drop-down is showing the app’s package name (com.commonsware.todo), leave it alone. On the other hand, if the package name drop-down is empty, click on it and choose the app’s package name. Leave the source language drop-down set to Kotlin.
This should give you a dialog like:
If you click on “Finish”, Android Studio will create your AboutActivity class and open it in the editor. The source code should look like:
package com.commonsware.todo

import androidx.appcompat.app.AppCompatActivity
import android.os.Bundle

class AboutActivity : AppCompatActivity() {
  override fun onCreate(savedInstanceState: Bundle?) {
    super.onCreate(savedInstanceState)
    setContentView(R.layout.activity_about)
  }
}
The new-activity wizard also added a manifest entry for us:
    <activity
      android:name=".AboutActivity"
      android:exported="true" />
Prev Table of Contents Next
This book is licensed under the Creative Commons Attribution-ShareAlike 4.0 International license.