DB Browser for SQLite
While there are a variety of standalone SQLite clients, in terms of desktop use, DB Browser for SQLite is arguably the most popular. It is open source, available for Linux/macOS/Windows, and is fairly easy to use.
Copying Your Database
It has no specific integration with Android or Android Studio, though, which means that you will need to copy your database off of your device or emulator and onto your development machine.
Ideally, your app’s process is terminated when you do this, so your app does not attempt to use the database while the copy operation is ongoing.
If you are using ordinary Room, your database will be in the default location for SQLite databases for your app. From the standpoint of development tools, for the primary device user, that will be:
/data/data/.../databases/
…where ... is your application ID.
In there, you will find a database file, with the name that you gave it in your RoomDatabase (e.g., stuff.db). Particularly if the app opened the database and did not explicitly close it, you will also see two additional files, with the same name as the database plus -shm and -wal extensions. You will need to copy all of these files to your development machine, most likely using Device File Explorer from Android Studio.
You can then open it in DB Browser for SQLite using the “Open Database” toolbar button, selecting the database file itself (not the -shm or -wal files, if any).
Basic Database Operations
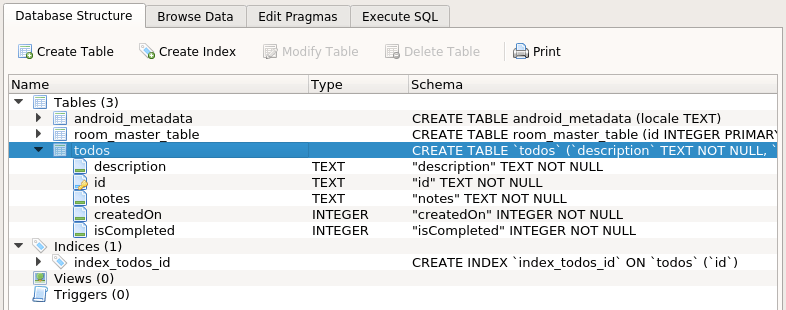
Like Database Inspector, DB Browser for SQLite gives you a tree of the various tables in the “Database Structure” tab, where you can see the schema for a table:

The “Browse Data” tab gives you a tabular view of the contents of a selected table, chosen via the drop-down in the tab’s own toolbar:

The “Execute SQL” tab lets you enter in your own queries or other operations (e.g., INSERT statements) and run them against your database. For queries or other statements that return results, you get a table showing those results:
Note, though, that if you modify the data and wish to persist those changes, you need to click the “Write Changes” toolbar button.
When you are done, if you click the “Close Database” button, the SQLite database will be closed cleanly, leaving you with just the database file and without any -shm or -wal file.
If you wish, you could then copy the database back to the device, using Device File Explorer. However:
- Be sure to terminate your app’s process before you do this, so you do not replace SQLite files behind Room’s back
- If your app’s data has
-shmand/or-walfiles, and you used “Close Database” to get a clean single-file copy of your database, in addition to copying that database to your device, you will need to remove the device’s-shmand-walfiles to match
Prev Table of Contents Next
This book is licensed under the Creative Commons Attribution-ShareAlike 4.0 International license.