Taking Control of the Situation
The TakeControl sample module in the book’s sample project contains a ControlsProviderService implementation that offers two tiles to the user: one based on a ToggleTemplate and one based on a RangeTemplate. The screenshots shown earlier in this chapter show “Take Control Demo” and those two tiles.
The Dependencies
While ControlsProviderService, ControlTemplate, and such are all part of the Android SDK, your Reactive Streams implementation is not. So, you will need to add in dependencies for that implementation.
This sample app uses RxJava 2, and so we have dependencies for it and the reactive-streams library that helps adapt RxJava 2 to the JDK’s Flow... set of interfaces:
  implementation "org.reactivestreams:reactive-streams:1.0.3"
  implementation "io.reactivex.rxjava2:rxjava:2.2.9"
The <service> Element
TakeControlService is our ControlsProviderService implementation. Like any Service, TakeControlService appears in the manifest with a <service> element. However, the <service> element has a few important pieces, beyond the android:name attribute that identifies the service class:
    <service
      android:name=".TakeControlService"
      android:label="@string/serviceLabel"
      android:permission="android.permission.BIND_CONTROLS">
      <intent-filter>
        <action android:name="android.service.controls.ControlsProviderService" />
      </intent-filter>
    </service>
The two that are documented are:
- You need the
<intent-filter>to advertise that your service is aControlsProviderService - You need the
android:permissionattribute to ensure that only the OS will be able to bind to your service
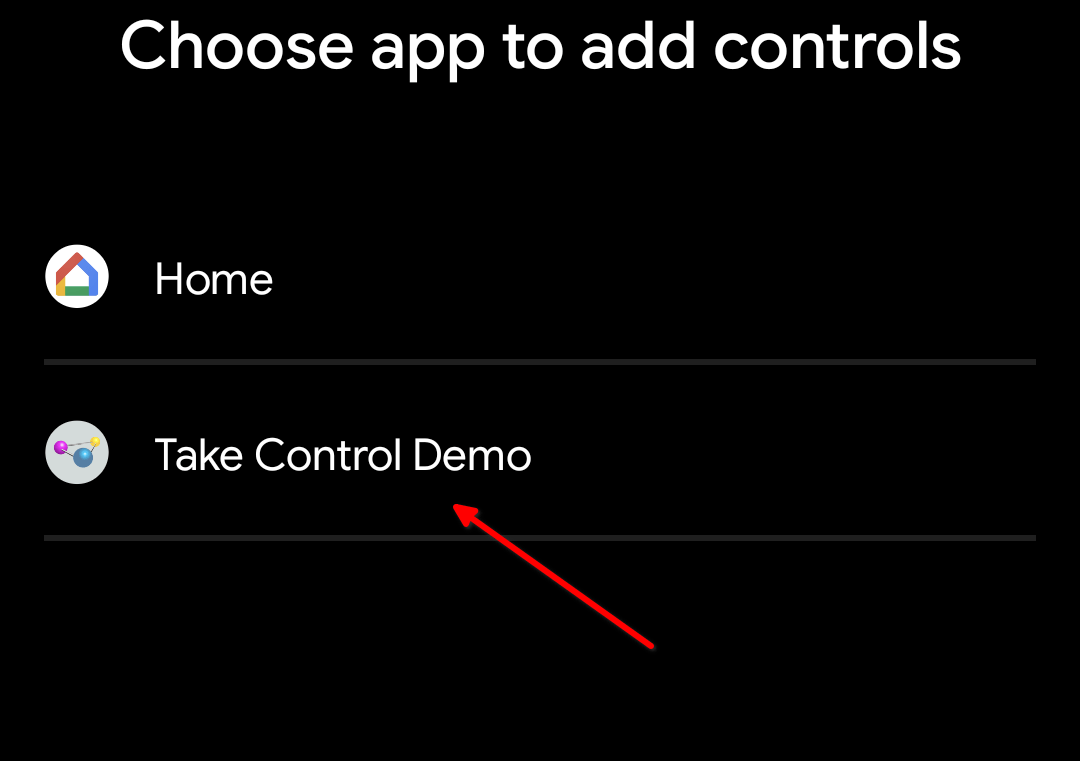
The requirement that is undocumented is android:label. This forms the display name of your ControlsProviderService. In the screenshots, where you see “Take Control Demo” is where your service’s android:label value appears, such as on the list of available providers:
Publishing All Available Controls
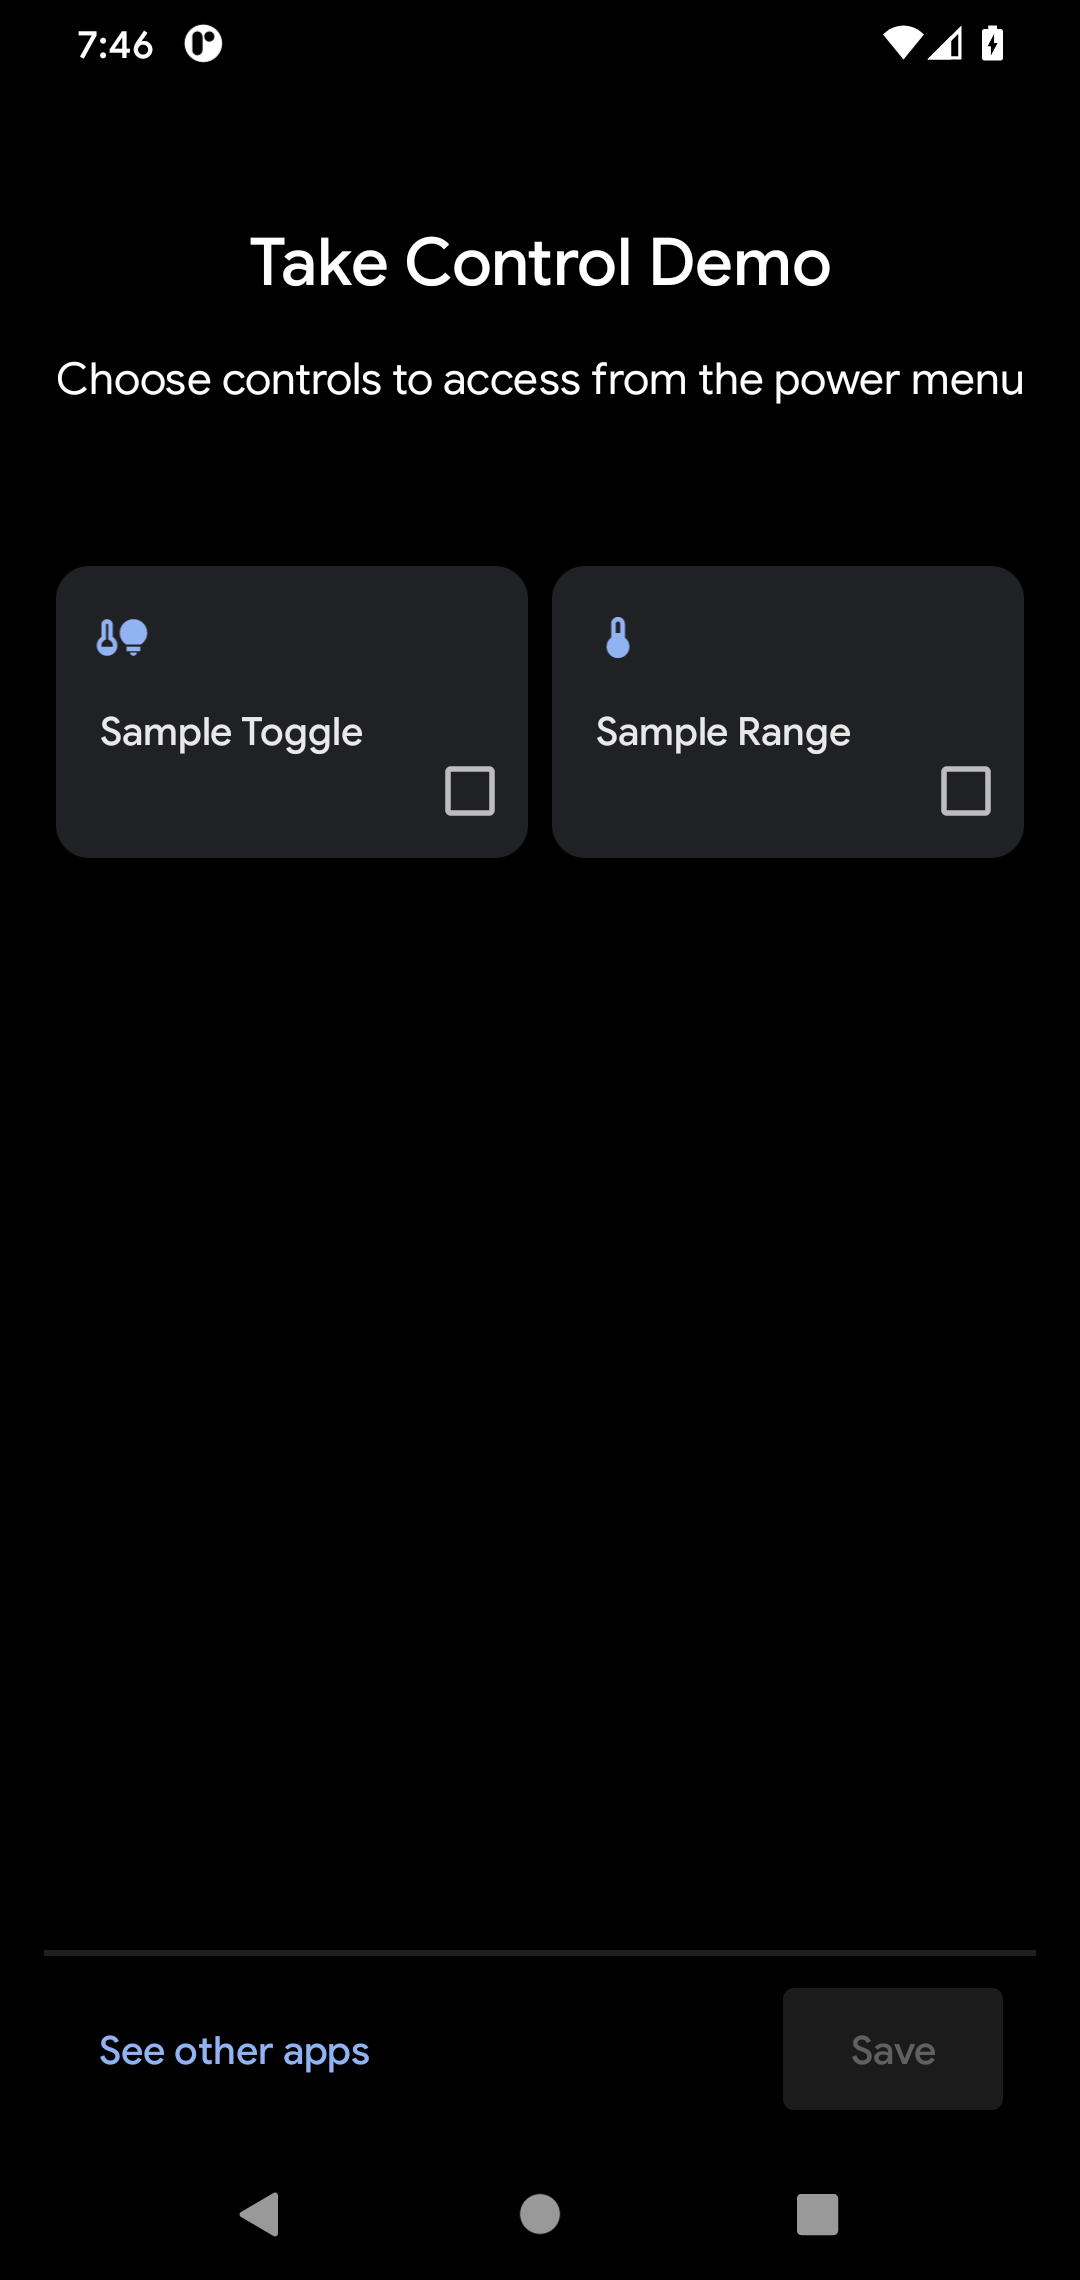
There are three abstract functions that we need to override in a ControlsProviderService. The first is createPublisherForAllAvailable(). Here, “all available” is referring to the roster of controls: we need to tell Android what are all the possible controls that can be offered to the user. This is what populates the control picker screen that we saw earlier:
This function needs to return a Flow.Publisher that will emit the Control objects as they become available… or all at once, as is the case in the sample:
  override fun createPublisherForAllAvailable(): Flow.Publisher<Control> =
    FlowAdapters.toFlowPublisher(
      Flowable.fromIterable(
        listOf(
          buildStatelessControl(TOGGLE_ID, TOGGLE_TITLE, TOGGLE_TYPE),
          buildStatelessControl(RANGE_ID, RANGE_TITLE, RANGE_TYPE)
        )
      )
    )
With the RxJava 2 and Reactive Streams libraries, the easiest way to create this Flow.Publisher is to create an RxJava Flowable, then convert it to a Flow.Publisher via FlowAdapters.toFlowPublisher(). And, the easiest possible Flowable (other than an empty one) is to create one from a List of objects using Flowable.fromIterable().
The Control objects that we need to emit on our Flow.Publisher must be made using Control.StatelessBuilder. At least in part, that is because the control picker screen is showing tiles representing controls, but not anything regarding the current state of the device that those controls control.
To that end, TakeControlService has a buildStatelessControl() function that uses Control.StatelessBuilder to build a Control. We pass in a unique Int ID, a string resource representing a title, and a DeviceType value, defined as constants:
private const val TOGGLE_ID = 1337
private const val TOGGLE_TITLE = R.string.toggleTitle
private const val TOGGLE_TYPE = DeviceTypes.TYPE_GENERIC_ON_OFF
private const val RANGE_ID = 1338
private const val RANGE_TITLE = R.string.rangeTitle
private const val RANGE_TYPE = DeviceTypes.TYPE_THERMOSTAT
buildStatelessControl(), in turn, builds the stateless Control:
  private fun buildStatelessControl(
    id: Int,
    @StringRes titleRes: Int,
    type: Int
  ): Control {
    val title = getString(titleRes)
    val intent = MainActivity.buildIntent(this, title)
      .addFlags(Intent.FLAG_ACTIVITY_NEW_TASK)
    val actionPI = PendingIntent.getActivity(
      this,
      id,
      intent,
      PendingIntent.FLAG_UPDATE_CURRENT
    )

    return Control.StatelessBuilder(id.toString(), actionPI)
      .setTitle(title)
      .setDeviceType(type)
      .build()
  }
The Control.StatelessBuilder constructor takes a unique ID (as a String) for this control, along with a PendingIntent. That PendingIntent will be invoked if the user long-taps on the tile for a control. It needs to be an activity PendingIntent, and it will be displayed in a system-supplied bottom sheet. That “embed the activity in a bottom sheet” hack has a side effect: the Intent used to build the PendingIntent must have FLAG_ACTIVITY_NEW_TASK on it, or else that bottom sheet will crash when it goes to display the activity. Alas, that requirement is undocumented.
As the name suggests, Control.StatelessBuilder is a class with a builder-style API. There are two configuration methods that we need to call, before we call build() to build the actual Control:
-
setTitle()sets the title that you see at the top of the tile -
setDeviceType()sets theDeviceTypeIntvalue that controls the icon associated with the tile
In a real app, you would be examining what devices the user has configured in your app, determining what controls you can offer for those, building stateless Control objects for those, and then emitting them via your Flow.Publisher. This sample hard-codes the available controls for simplicity.
If you have a lot of controls, you might also consider overriding createPublisherForSuggested(). This allows you to supply a separate Flow.Publisher for a subset of your controls, indicating ones that you feel are most likely to be of use to the user.
Updating Specific Controls
The second required method is createPublisherFor(). This will be called with a list of the string IDs of the controls that the user selected from the control picker. Your job is emit stateful Control objects on a Flow.Publisher for those controls, both initially and if the device state represented by the control changes. So, for example, if you have a control representing the on/off state of a light switch, you will need to emit a stateful Control to indicate the current state of that switch as of the call to createPublisherFor() and if the state of that switch changes.
This time, since (in theory) we are delivering results over time, we cannot just create a Flowable from a List. Instead, we use RxJava’s ReplayProcessor:
  override fun createPublisherFor(controlIds: List<String>): Flow.Publisher<Control> {
    val flow: ReplayProcessor<Control> = ReplayProcessor.create(controlIds.size)

    controlIds.forEach { controlFlows[it] = flow }

    executor.execute {
      // TODO real work to figure out the state, simulated by a one-second delay
      SystemClock.sleep(1000)

      flow.onNext(buildToggleStatefulControl())

      // TODO real work to figure out the state, simulated by a one-second delay
      SystemClock.sleep(1000)

      flow.onNext(buildRangeStatefulControl())
    }

    return FlowAdapters.toFlowPublisher(flow)
  }
We are going to need to use that Flow.Publisher over time, and the API for ControlsProviderService does not hand it back to us. In theory, we might be called with createPublisherFor() several times for several lists of controls — this is not well-documented. So, the sample holds onto the ReplayProcessor in a MutableMap, keyed by the string ID value:
  private val controlFlows =
    mutableMapOf<String, ReplayProcessor<Control>>()
And, at the end of our createPublisherFor() function, use use FlowAdapters.toFlowPublisher() to convert that ReplayProcessor into a Flow.Publisher for Android to use.
We also need to arrange to emit the stateful controls for those IDs. However, this may take time — you might need to talk to some hardware over a slow BLE connection, for example. To simulate this, the sample uses a single-thread Executor and a couple of sleep() calls to pretend to do work. Then, we use a buildToggleStatefulControl() and buildRangeStatefulControl() to emit Control objects representing the now-current state.
Those two functions mostly delegate to a buildStatefulControl() function, just passing in a bunch of values:
  private fun buildToggleStatefulControl() = buildStatefulControl(
    TOGGLE_ID,
    TOGGLE_TITLE,
    TOGGLE_TYPE,
    toggleState,
    ToggleTemplate(
      TOGGLE_ID.toString(),
      ControlButton(
        toggleState,
        toggleState.toString().toUpperCase(Locale.getDefault())
      )
    )
  )

  private fun buildRangeStatefulControl() = buildStatefulControl(
    RANGE_ID,
    RANGE_TITLE,
    RANGE_TYPE,
    rangeState,
    RangeTemplate(
      RANGE_ID.toString(),
      1f,
      10f,
      rangeState,
      0.1f,
      "%1.1f"
    )
  )
We need to supply the same ID, title, and type as we did with the stateless controls. We also need to supply the value of the current state, which for a toggle is a Boolean and for a range is a Float. Those are simply held onto as properties in the service in this trivial sample:
  private var toggleState = false
  private var rangeState = 5f
A real app would be getting them from the actual device being controlled by this service. And, a real app would not make any assumptions about how long the ControlsProviderService instance might be running — the framework could destroy and recreate the service as it sees fit. But, for a sample, this will suffice.
buildStatefulControl() also takes the ControlTemplate for the control that we are trying to build. In the case of the toggle control, that is a ToggleTemplate, and in the case of the range control that is a RangeTemplate. A template also gets a unique ID as a string, though reusing the same ID as is used for the Control the template goes into seems to work, at least for simple templates like these. The rest of the template configuration is based on the type of the template:
- A
ToggleTemplatejust takes aControlButton, with a boolean value to indicate if it is checked and a seemingly-pointlessStringparameter - A
RangeTemplatetakes the minimum and maximum values of the range (e.g.,1fto10f), the current value, how granular the changes should be (e.g.,0.1f), and a “format string” that will be used to format the state for display
Here, “format string” refers to the sort of template that you use with String.format() or string resources. Here, we use %1.1f to show the current value to one decimal point.
buildStatefulControl() then uses all of that stuff and assembles our Control using Control.StatefulBuilder:
  private fun <T> buildStatefulControl(
    id: Int,
    @StringRes titleRes: Int,
    type: Int,
    state: T,
    template: ControlTemplate
  ): Control {
    val title = getString(titleRes)
    val intent = MainActivity.buildIntent(this, "$title $state")
      .addFlags(Intent.FLAG_ACTIVITY_NEW_TASK)
    val actionPI = PendingIntent.getActivity(
      this,
      id,
      intent,
      PendingIntent.FLAG_UPDATE_CURRENT
    )

    return Control.StatefulBuilder(id.toString(), actionPI)
      .setTitle(title)
      .setDeviceType(type)
      .setStatus(Control.STATUS_OK)
      .setControlTemplate(template)
      .build()
  }
Control.StatefulBuilder has a builder-style API with the same setTitle() and setDeviceType() methods as does Control.StatelessBuilder. You also need to call:
-
setStatus(), typically withSTATUS_OK, to indicate that you are able to determine the status of the control -
setControlTemplate(), with your configuredControlTemplatefor this control
There are other methods that you can call, such as setStatusText(), which provides the String to show after the icon (and, in the case of RangeTemplate, before the formatted value of the current selection).
Once you deliver those to Android — by calling onNext() on your ReplayProcessor — Android will update the UI of the tile to show the state, if the user happens to have the power menu open at the time. You will be called with createPublisherFor() each time the user opens the power menu.
Responding to Actions
The third method that you need to override is performControlAction(). This will be called when the user interacts with the control, other than via a long-click (which invokes your PendingIntent). Your job is to update the device based on that action, then emit a fresh stateful Control with the updated state.
  override fun performControlAction(
    controlId: String,
    action: ControlAction,
    consumer: Consumer<Int>
  ) {
    controlFlows[controlId]?.let { flow ->
      when (controlId) {
        TOGGLE_ID.toString() -> {
          consumer.accept(ControlAction.RESPONSE_OK)
          if (action is BooleanAction) toggleState = action.newState
          flow.onNext(buildToggleStatefulControl())
        }
        RANGE_ID.toString() -> {
          consumer.accept(ControlAction.RESPONSE_OK)
          if (action is FloatAction) rangeState = action.newValue
          flow.onNext(buildRangeStatefulControl())
        }
        else -> consumer.accept(ControlAction.RESPONSE_FAIL)
      }
    } ?: consumer.accept(ControlAction.RESPONSE_FAIL)
  }
The first parameter to performControlAction() is the String ID of the control that the user used. We use that both to look up the cached ReplayProcessor for that control and to branch in a when() to process the action.
The second parameter is a ControlAction object, representing the actual action that the user performed. For a ToggleTemplate control, it should be a BooleanAction, and for a RangeTemplate control, it should be a FloatAction.
The third parameter is a Consumer, which we use to tell Android whether we understood the request. Call accept() on the Consumer with RESPONSE_OK if you are able to process the action or RESPONSE_FAIL if you cannot for some reason.
In our case, we:
- Look up the
ReplayProcessorfor the supplied ID - If we recognize the ID, call
accept()withRESPONSE_OK - Update the state property for that control based on the value contained in the action
- Use
buildToggleStatefulControl()orbuildRangeStatefulControl()to build a fresh statefulControlrepresenting the updated state, then emit that usingonNext()on ourReplayProcessor
Here, the sample does all of that immediately. In a real app, updating the device with the new state may take time, and so you would have some background thread do that work and emit the updated Control when the device has been modified.
The Results
If the user chooses “Take Control Demo” from the available control providers, they will see the stateless editions of our tiles as samples:
If they check both of those, those tiles will appear in the power menu, initially as stateless editions:

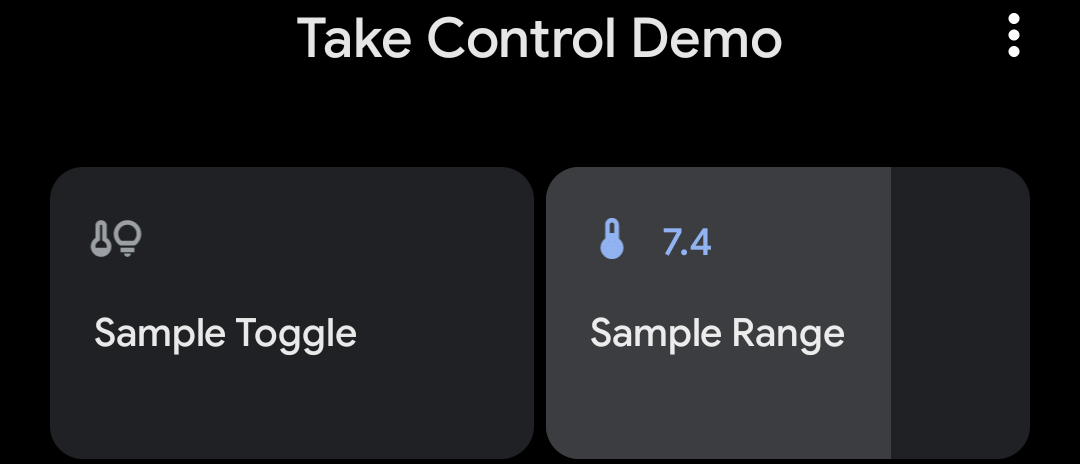
Eventually, the stateful editions of our tiles are displayed. In particular, the “Sample Range” tile shows our current value (via that format string) and has a shaded fill to highlight how far along the range the current value is:
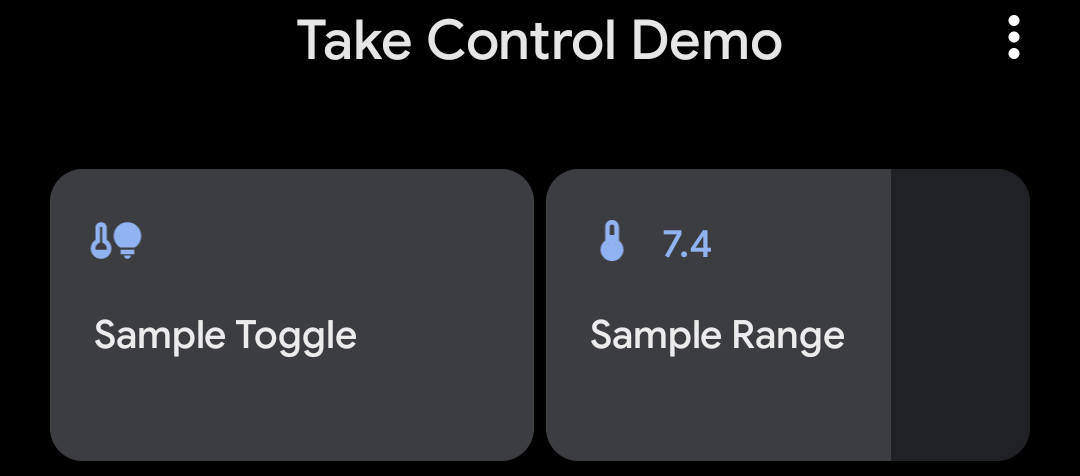
The user can tap on the “Sample Toggle” to toggle it on, which shows up with a highlight when on:
Similarly, the user can slide their finger horizontally across the range tile to change its value.
As the user makes changes, actions get sent to our performControlAction() implementation, and it is our emitted stateful control in response that helps determine the end visual state.
If the user long-presses on a tile, the activity identified in our PendingIntent is created and shown… in a bottom sheet:
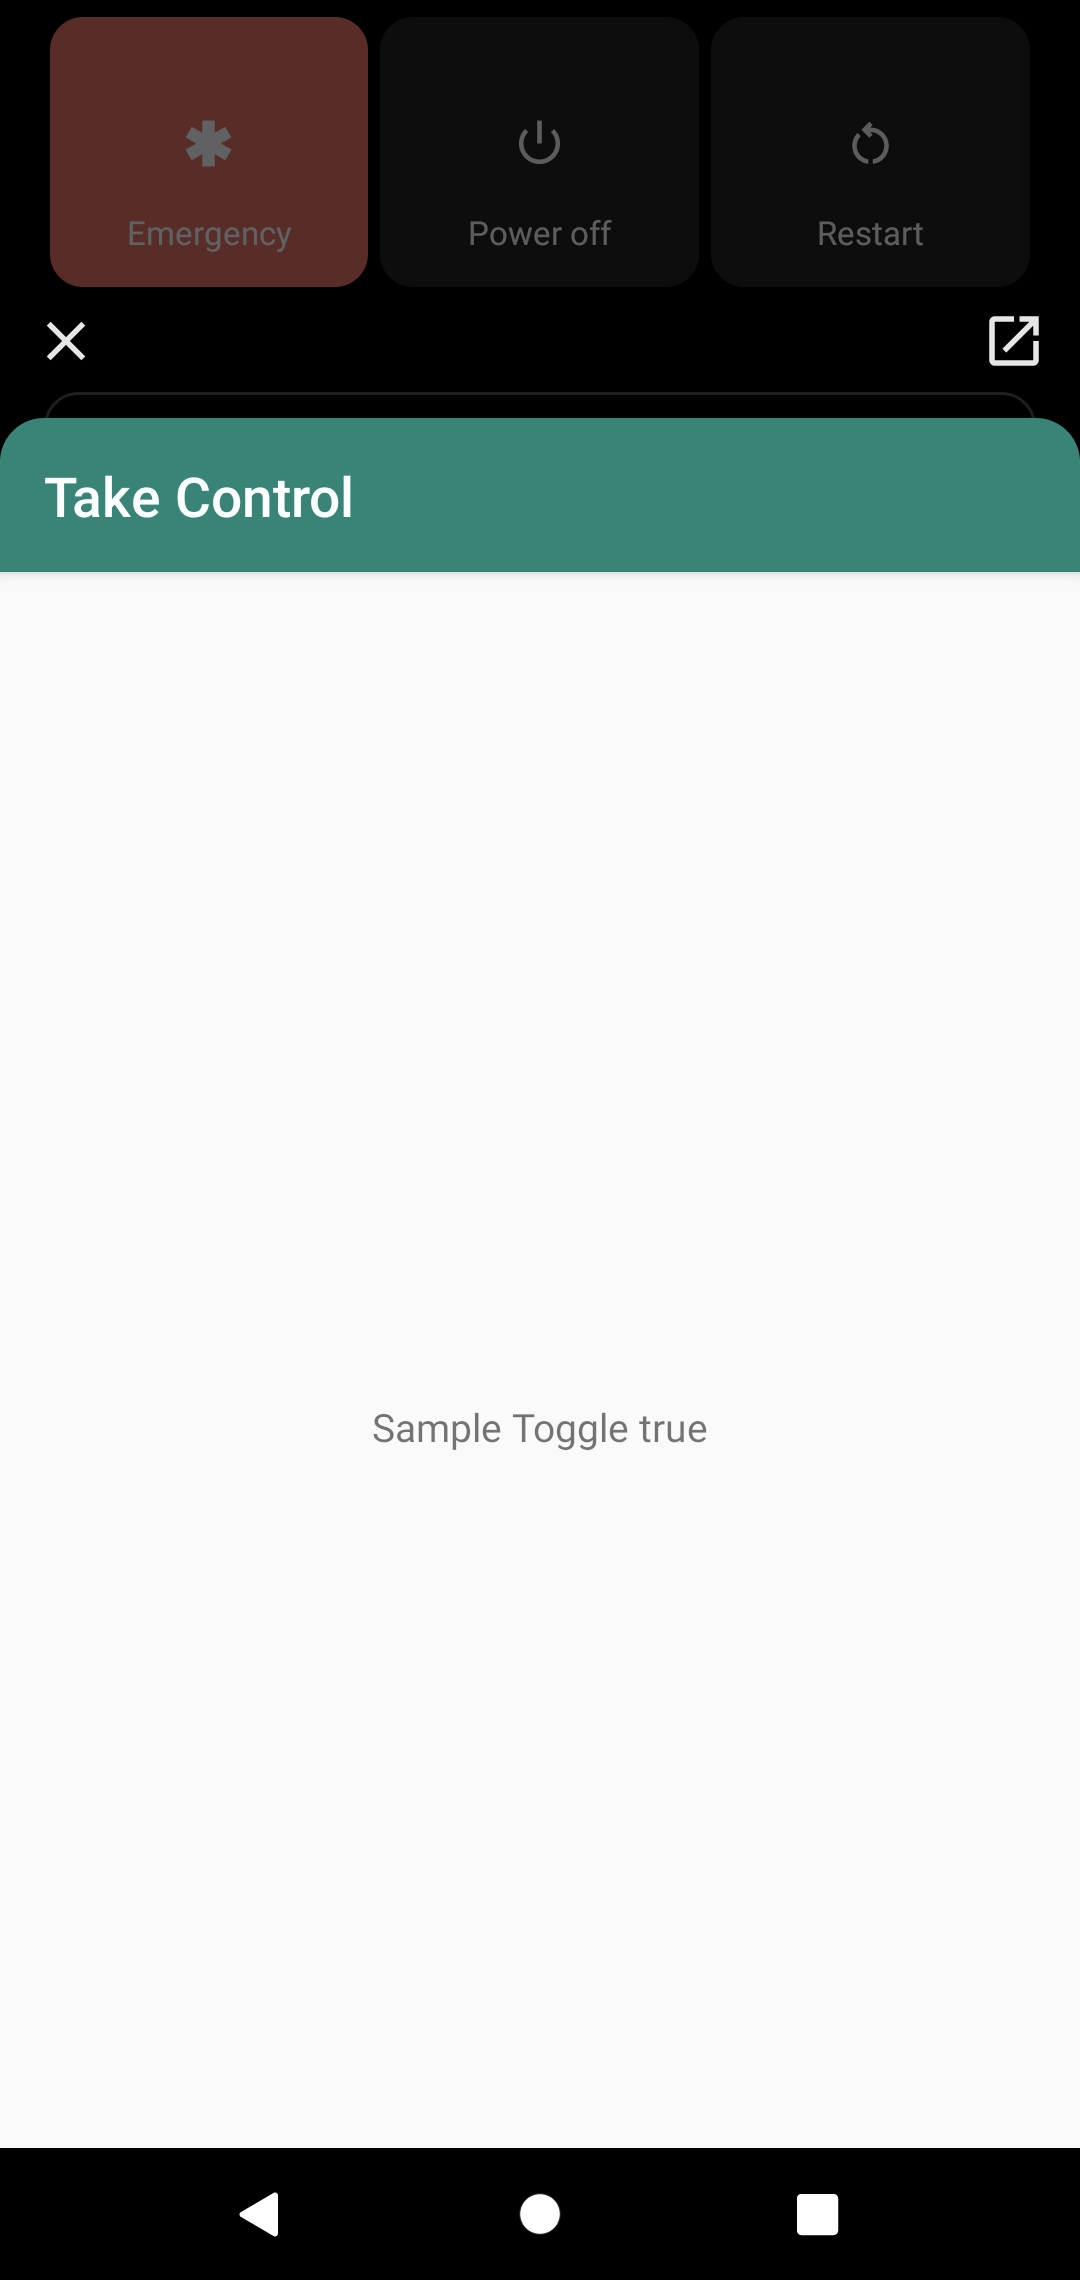
The icon in the upper-right allows the user to expand the activity into a traditional full-screen size.
Ideally, the activity will show something of relevance to the tile just long-pressed-upon.
Prev Table of Contents Next
This book is licensed under the Creative Commons Attribution-ShareAlike 4.0 International license.