Using the SDK Manager
When you installed Android Studio, along with it came some initial pieces of the Android SDK. That is enough to get you going, but eventually, you will need to download more of that SDK. That is handled through an “SDK Manager” portion of the Settings UI in Android Studio.
You can get to the SDK Manager in three ways:
- Choosing Tools > SDK Manager from the main menu
- Clicking the associated toolbar button:

- Choosing File > Settings from the main menu, then navigating to “Appearance & Behavior” > “System Settings” > “Android SDK” in the category tree on the left (or search for “Android SDK” in the search field)
Installing Platform Pieces
The SDK Manager has three tabs. The left-most of these is “SDK Platforms”, and it is where you can install things that are tied to specific Android OS versions:
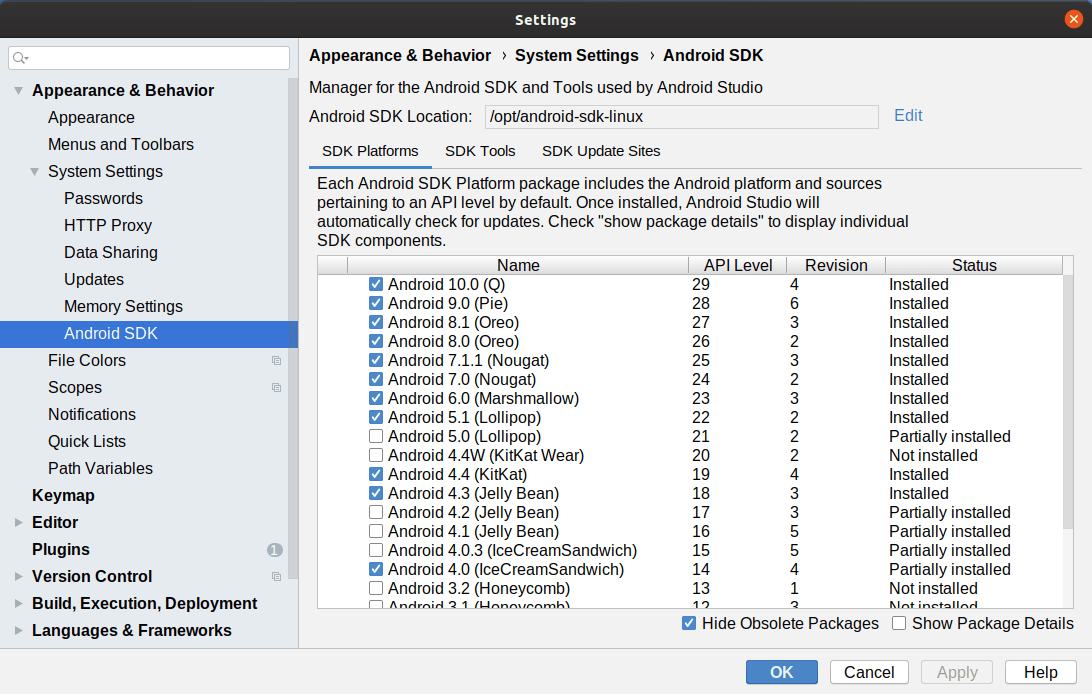
The table lists Android OS versions along with a status of “Installed”, “Partially installed”, or “Not installed”. Those statuses are not especially accurate — to get a better understanding of what you have and what you can get, check the “Show Package Details” checkbox towards the bottom of the dialog. This turns the table into a tree-table, showing more precise information:
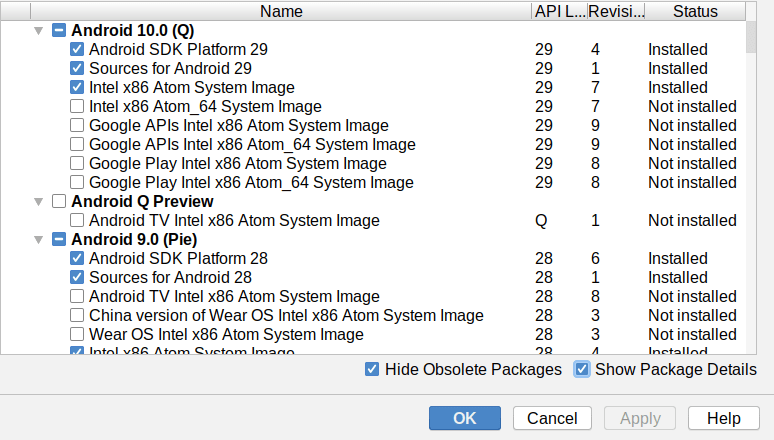
In general:
- “Android SDK Platform NN” (for some API level value NN, like 29), represents the stuff needed to allow you to have that version specified in
compileSdkVersionin your module’sbuild.gradlefile. - “Sources for Android NN” is the source code for the Android SDK for that API level. This allows you to do things like step into the source code in the debugger, or to jump to the declaration of an SDK-supplied class or method in the IDE.
- “… System Image” represent emulator images that you can use as the basis for an AVD.
If you wish to change what you have installed, check or uncheck the various items, then click either “Apply” (to make the changes) or “OK” (to make the changes and close the dialog).
A few times per year, you may find yourself in this tab, downloading SDK bits for a new Android version (and perhaps uninstalling older bits to free up disk space).
Prev Table of Contents Next
This book is licensed under the Creative Commons Attribution-ShareAlike 4.0 International license.