The New-Project Wizard
For many developers, the “go-to” approach for creating a new project is via the new-project wizard. Typically, you get to that wizard via “File” > “New” > “New Project…” from the main menu:

If you are at the “welcome dialog” and do not have a project open, there is a “Start a new Android Studio project” option that opens the new-project wizard.
Project Template
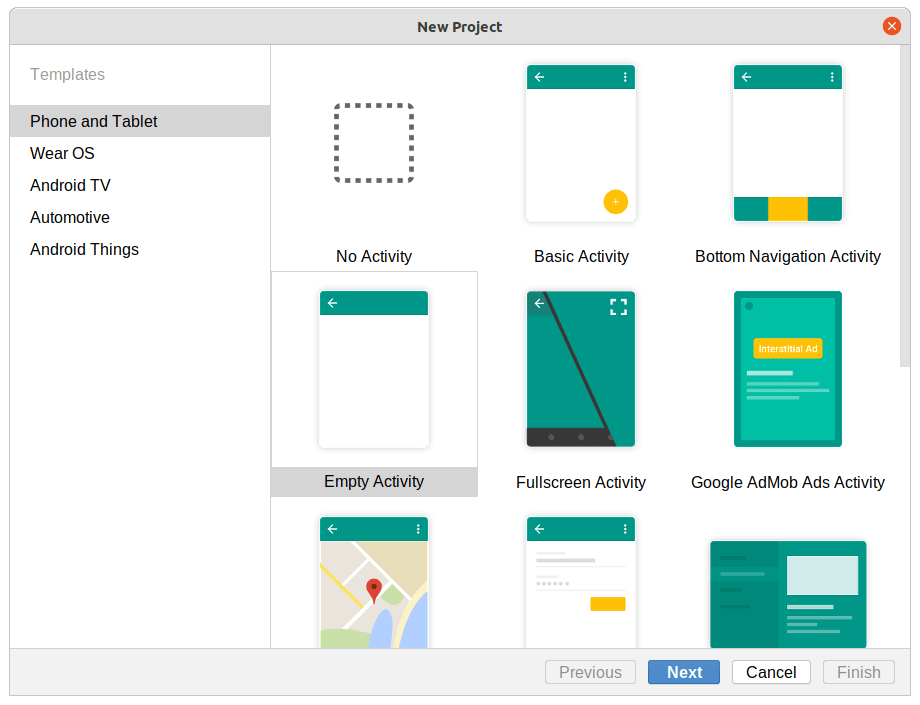
The first page of the wizard allows you to choose a template for your new project:
What You Get
The idea is that you would choose a template that matches the starting point that you want for the app. The new-project wizard will give you classes, resources, and so on that are based on the template. The theory is that you could then use those files as the starting point, tweaking them as needed and blending in your own application logic.
What Else You Need to Do
In reality, these templates are mostly for samples or scrap projects for experimentation. Invariably, you will replace or remove a substantial amount of what they create for you. As such, do not spend a lot of time worrying about which template to use for a new project. The “Empty Activity” template traditionally has the least amount of “cruft” to remove.
However, do not be afraid to play around with the templates in scrap projects. The output from the templates is not always the absolute best code, but it may help you learn a bit more about various features of Android, including some stuff not covered by this book.
Project Details
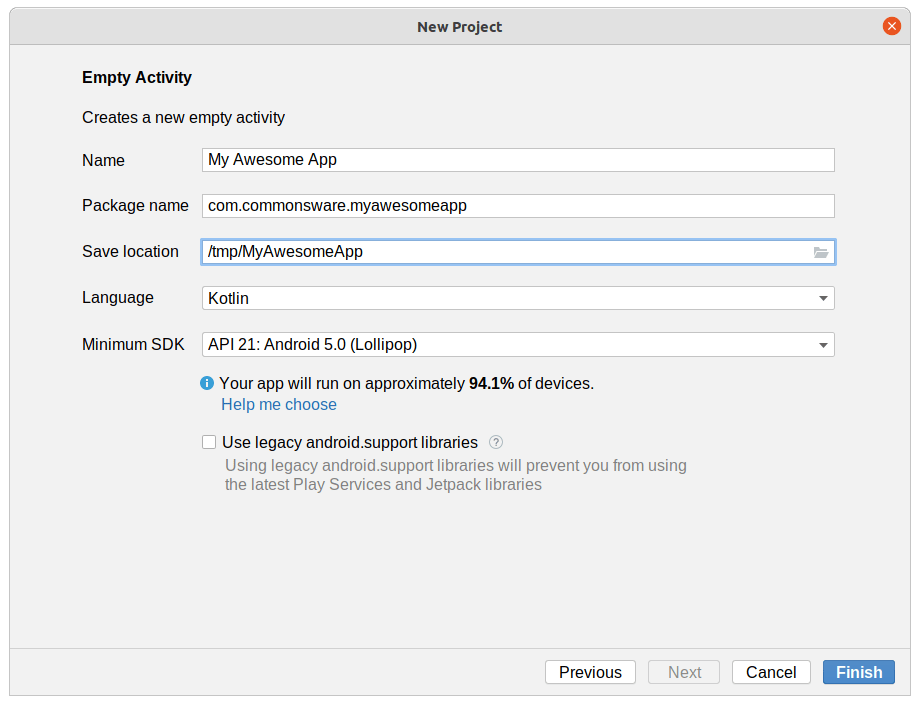
Once you choose a template and click the “Next” button, you will be taken to the second page of the new-project wizard, where you can provide the core details of the project that you want to create:
Core Elements
The “Name” field is the display name for your app. It will be placed in the app_name string resource and will be used in the manifest as the label for your app and activity.
The “package name” is your application ID. If you create several projects, Android Studio will remember the top-level domain that you use for your projects and will pre-fill that in as part of a generated sample application ID.
“Save location” is where on your development machine’s filesystem you would like your project to go. Android Studio will create the directory for you if it does not already exist, and Android Studio may complain if you try creating a project in a directory that exists and already has files in it.
Choosing the Minimum SDK Version
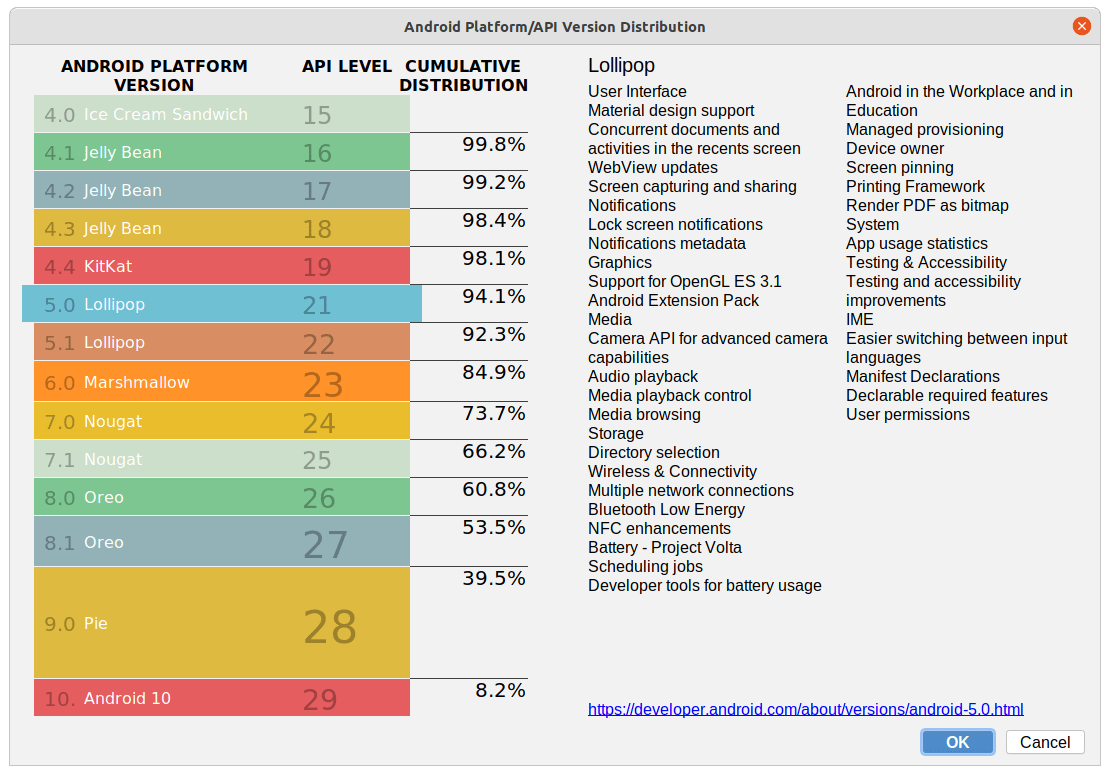
A drop-down lets you specify your desired minSdkVersion value. The “help me choose” link beneath it will bring up a dialog showing you highlights of what was added in each Android release, along with an approximate percentage of Google Play ecosystem devices run that API level or lower:
Additional Screens
Most of the templates do not ask for any additional information than what appears in the “Configure your project” wizard page. However, a few do continue to a third wizard page. The “Native C++” template is one:
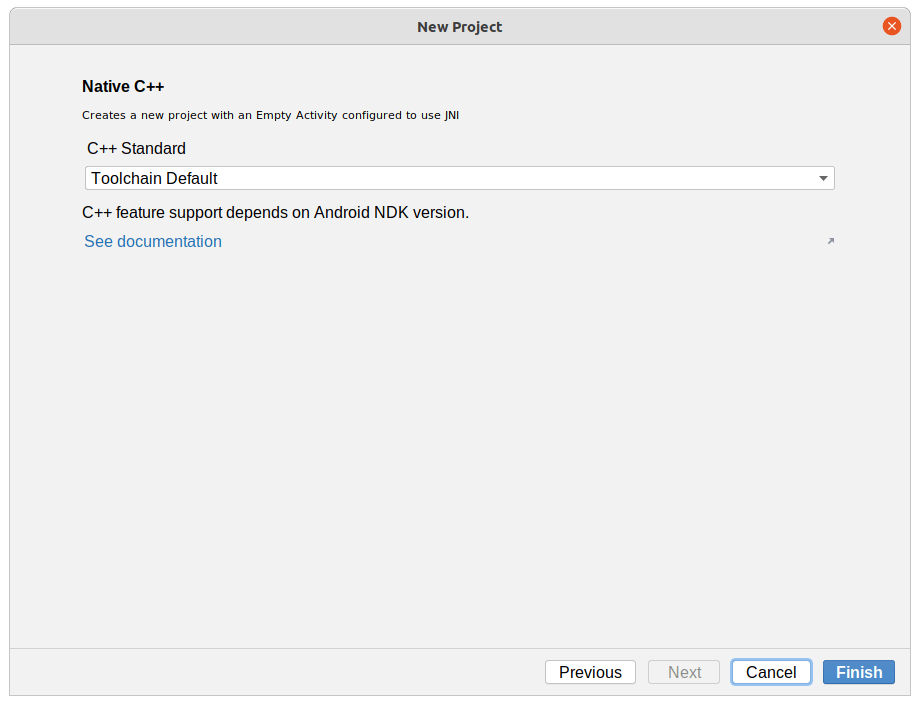
This template sets up a project where all code is written in C/C++ instead of in Java/Kotlin. This third wizard page lets you choose what particular C++ version you want (C++11, C++14, or whatever the default it).
You’re Done!
Once you click the “Finish” button, Android Studio will create your project to your specifications. The standard IDE window will appear, showing you what it generated.
Prev Table of Contents Next
This book is licensed under the Creative Commons Attribution-ShareAlike 4.0 International license.