Navigating Your App
In the beginning, if we wanted multiple screens of content, we would use multiple activities. To switch from screen to screen, we would use startActivity().
As Android evolved, many developers started to use fragments. To switch from screen to screen, we would execute a FragmentTransaction.
All of that works and you are welcome to use it.
However, as part of Jetpack, Google is pushing a new Navigation component. This serves as a replacement for many direct uses of FragmentTransaction and startActivity(), while still allowing you to navigate from activities and fragments to other activities and fragments.
What We Get from the Navigation Component
The Navigation component does not add any new capabilities to Android. It can’t, after all — it comes from a library, and anything that can be done by Library A could be done by Library B or Hand-Written-Code C. Anything you can do with the Navigation component you can do “the old-fashioned way” using startActivity(), FragmentTransaction, and related techniques.
So… why bother with the Navigation component?
Uniform API/Isolation of Details
When we call startActivity(), we have to provide an Intent that identifies the activity that we want to start. When we commit a FragmentTransaction, we have to configure that object with an instance of the fragment to be displayed. As a result:
- Our code is tied to a specific type of navigation (activity or fragment)
- Our code knows implementation details of the destination (the Java/Kotlin class that is the target)
A big thing in computer programming is “separation of concerns”. We want one chunk of code to know as little as possible about the next chunk of code, in case we need to radically change the implementation of either chunk. With classic manual navigation, our activities and fragments know more about the other activities and fragments than is ideal.
With the Navigation component, we start to get away from that.
One key aspect is that all navigation is the same with the Navigation component. When we want to switch to a different screen, we use the same API regardless of whether that screen is implemented by an activity or a fragment. Hence, we want to switch implementations someday (e.g., convert an activity to a fragment), the code that navigates to that changed destination may not itself need to change.
Another aspect is that the details of how different screens are implemented is contained in a new type of resource (navigation). The resource contains details about classes and whether they represent activities or fragments. The resource uses IDs — akin to widget IDs — to identify screens and how we get there. Our Java/Kotlin code uses those IDs to tell the Navigation component where we want to go. So, now not only do we use one API for navigating to both activities and fragments, but the details of which activities and fragments are hidden behind an ID. If we want to swap out one implementation of a screen with another, those navigating to that screen should not need to change.
Graphical Representation of Flows
The navigation resource type, like most of Android’s resources, is an XML file with a particular set of elements. And, like layout and menu resources, Android Studio offers a graphical editor for navigation resources, allowing you to connect screens using a drag-and-drop interface:
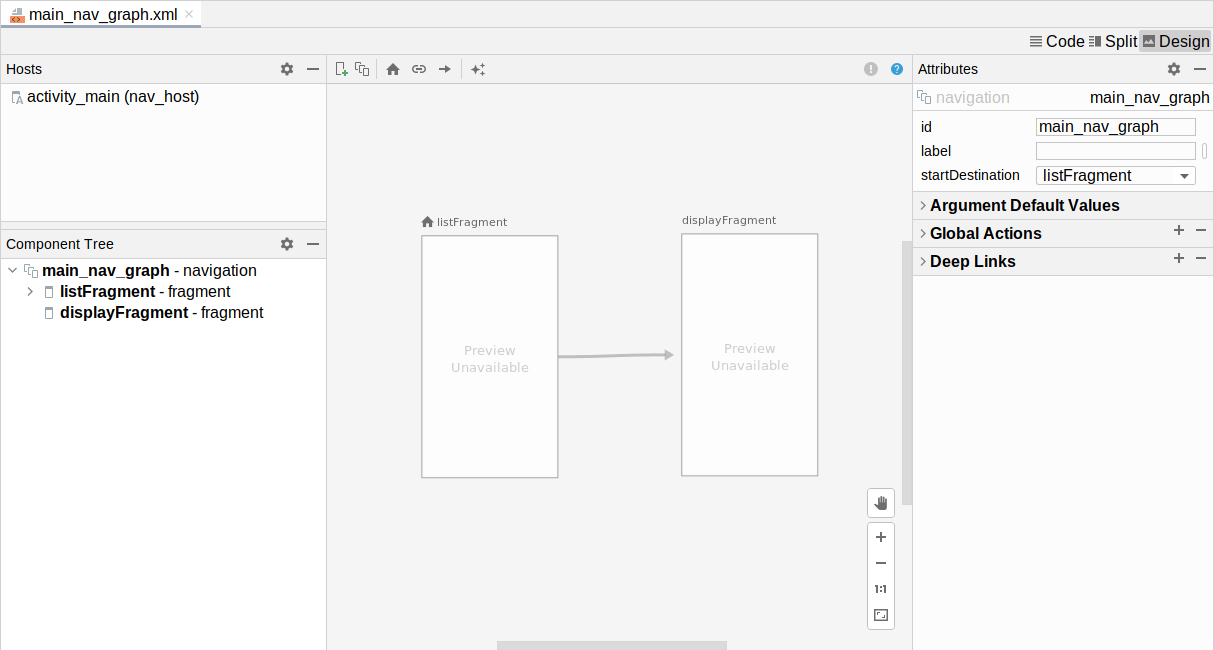
We will explore the use of this editor later in this chapter.
“Safe Args”
In both the chapter on activities and the chapter on fragments, we saw how we can pass data from one screen to another. In the case of activities, that is in the form of Intent extras. In the case of fragments, that is in the form of the arguments Bundle. As it turns out, the extras in an Intent are contained in a Bundle, so in both forms of manual navigation, your data is passed via a Bundle.
The problem with a Bundle is that while a Bundle supports a range of data types for values, any key could have any of those data types. This can lead to problems, if the sender specifies a String where the recipient is expecting an Int, or something like that. It is as if we got rid of the strong typing available in Java/Kotlin and just held onto all of our data in Map objects.
An add-on to the Navigation component helps with this by offering “Safe Args”. Part of the details that we can put into the navigation resource is what data is expected by any given screen. Then, Android Studio will code-generate:
- A class to help code wishing to navigate to that screen provide the data, with the expected data types
- A class to help the implementation of the screen retrieve that data, once again with the expected data types
“Under the covers”, those generated classes work with Intent extras and the arguments Bundle, but those implementation details are hidden from us. This gives us type-safe navigation, so we do not accidentally provide data of the wrong type.
App Bar Up Integration
You may have noticed that in some apps, in some cases, a leftward-pointing arrow appears in the app bar:

This button allows the user to navigate “up” in the app. In most cases, this is the same as the user pressing the system BACK button in the navigation bar. Sometimes, in complicated apps with complicated navigation, up might lead somewhere else that represents “up” in some hierarchy of content.
The Navigation component allows you to tie your app bar (e.g., a Toolbar) into the navigation flow, such that the “up” button is shown when the Navigation component deems it to be appropriate.
Simpler Support of Advanced Features
Those reasons may be enough to warrant experimenting with the Navigation component.
For veteran Android developers, the Navigation component also helps to simplify the use of a variety of advanced features, such as:
- “Deep links”, to help Google’s search engine and other Web content to launch an app (via a link) and drive straight to some inner portion of that app, instead of just opening the launcher activity
- Transitions, a means by which we can give the appearance of a widget from one screen “moving” to another screen, such as a thumbnail image in a list “zooming” into a larger image when the user clicks on the list item and goes to a detail screen
Prev Table of Contents Next
This book is licensed under the Creative Commons Attribution-ShareAlike 4.0 International license.