Integrating Common Form Widgets
TextView, Button, and EditText form the foundation of many user interfaces in Android, and their analogues form the foundation of other GUI toolkits.
Overall, the Android SDK has a reasonable range of widgets to choose from, though not everything is covered. In this chapter, we will review a number of other commonly-used widgets in the Android SDK and explore some other capabilities of Android’s UI system.
All of the code in this chapter comes from the FormWidgets module of the Java and Kotlin sample projects.
ImageView and ImageButton
Android has two widgets to help you embed images in your activities: ImageView and ImageButton. As the names suggest, they are image-based analogues to TextView and Button, respectively.
Each widget takes an android:src attribute (in a layout resource) to specify what picture to use. These usually reference a drawable resource (e.g., @drawable/icon) or sometimes a mipmap resource (e.g., @mipmap/ic_launcher).
ImageButton, a subclass of ImageView, mixes in the standard Button behaviors. While both ImageView and ImageButton can call your code when they are clicked, ImageButton has built-in logic to visually respond to the click, the way that Button does.
Our sample app has an ImageView named icon and an ImageButton named button:
    <ImageView
      android:id="@+id/icon"
      android:layout_width="wrap_content"
      android:layout_height="wrap_content"
      android:layout_marginTop="@dimen/margin_row"
      android:contentDescription="@string/icon_caption"
      android:src="@mipmap/ic_launcher"
      app:layout_constraintEnd_toEndOf="parent"
      app:layout_constraintStart_toStartOf="parent"
      app:layout_constraintTop_toBottomOf="@id/log" />

    <ImageButton
      android:id="@+id/button"
      android:layout_width="wrap_content"
      android:layout_height="wrap_content"
      android:layout_marginTop="@dimen/margin_row"
      android:contentDescription="@string/button_caption"
      android:src="@mipmap/ic_launcher"
      app:layout_constraintEnd_toEndOf="parent"
      app:layout_constraintStart_toStartOf="parent"
      app:layout_constraintTop_toBottomOf="@id/icon" />
These then show up in our overall activity’s output, which stacks a bunch of widgets in a ConstraintLayout:
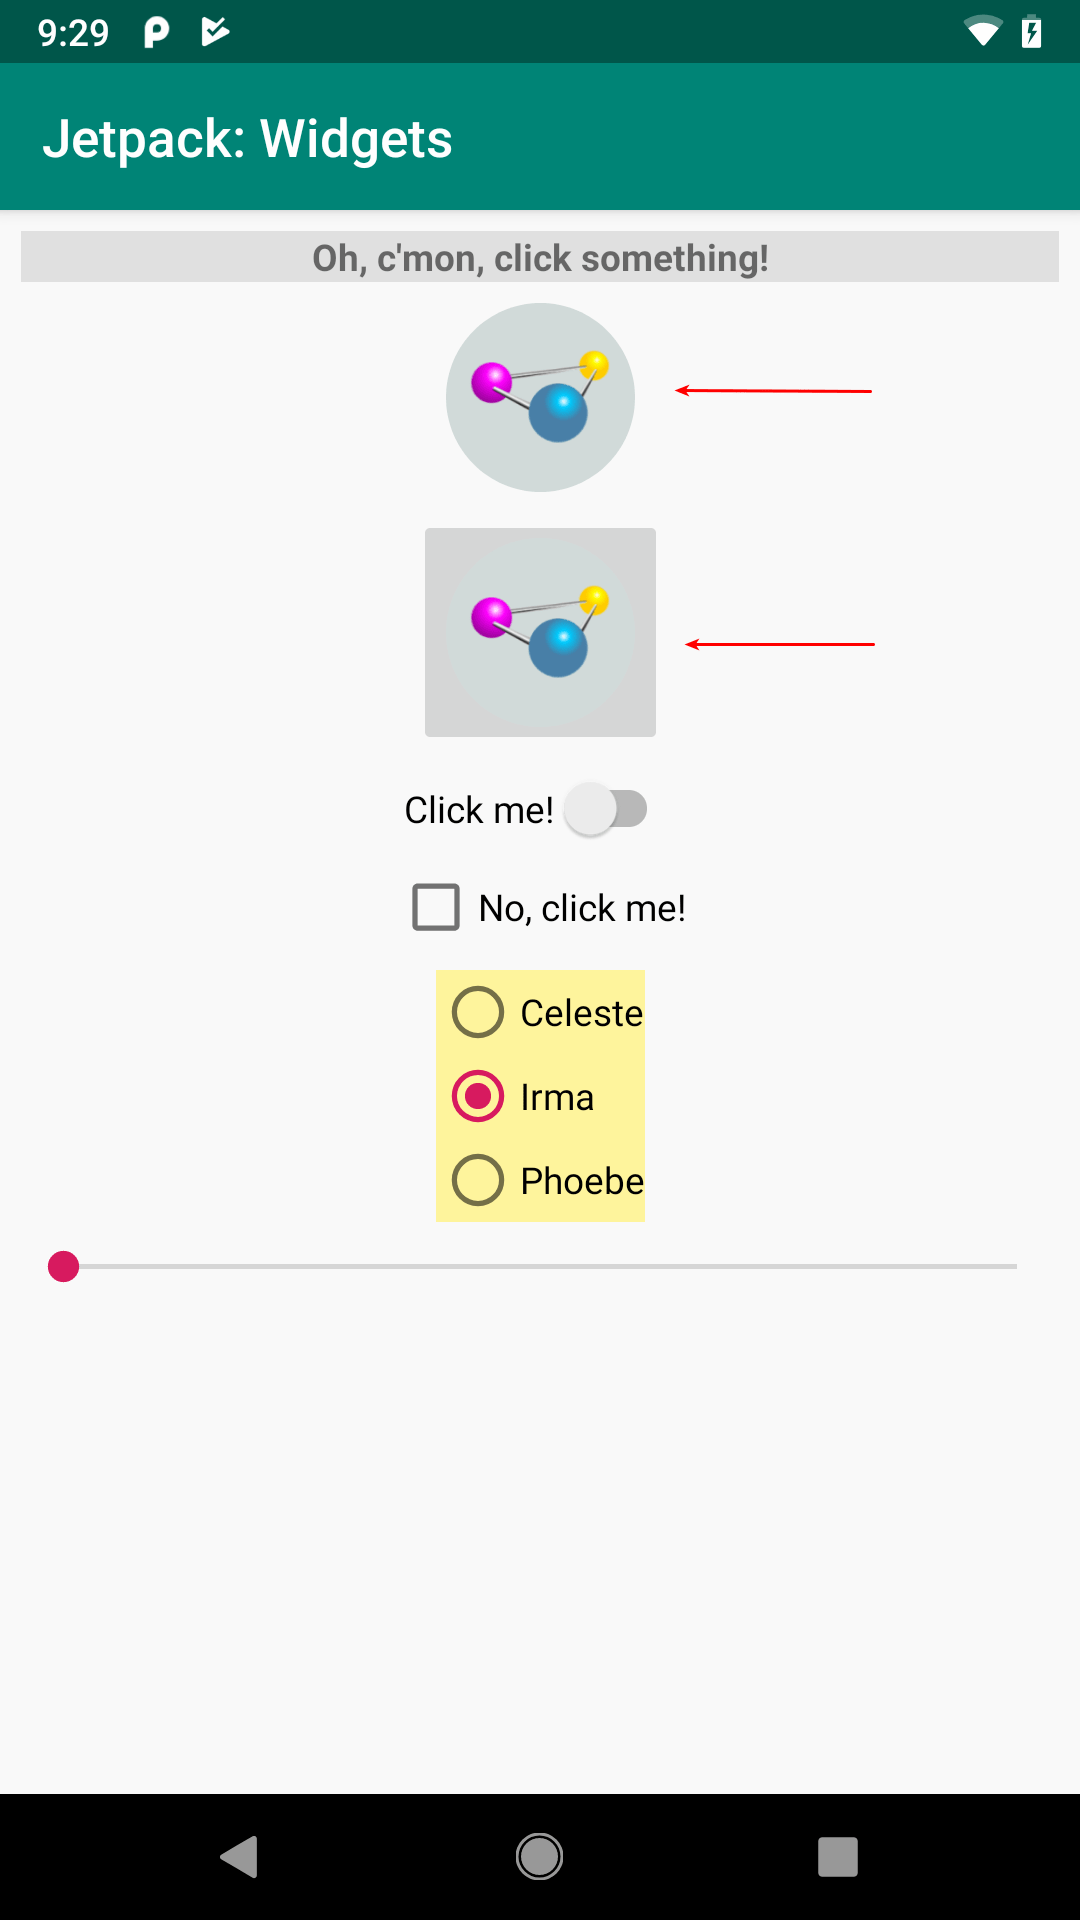
FormWidgets Sample, with
ImageView and
ImageButton Highlighted
Android Studio Graphical Layout Editor
The ImageView widget can be found in the “Common” portion of the Palette in the Android Studio graphical layout editor:
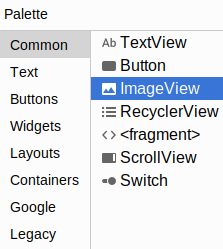
ImageView Shown Highlighted
ImageButton shows up in the “Buttons” portion:
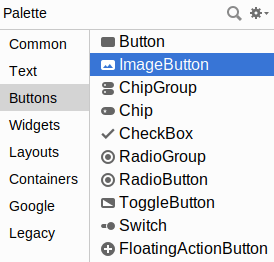
ImageButton Shown Highlighted
When you drag one of these into the preview or blueprint, you are immediately greeted by a dialog to choose a drawable resource or color to use for the image:
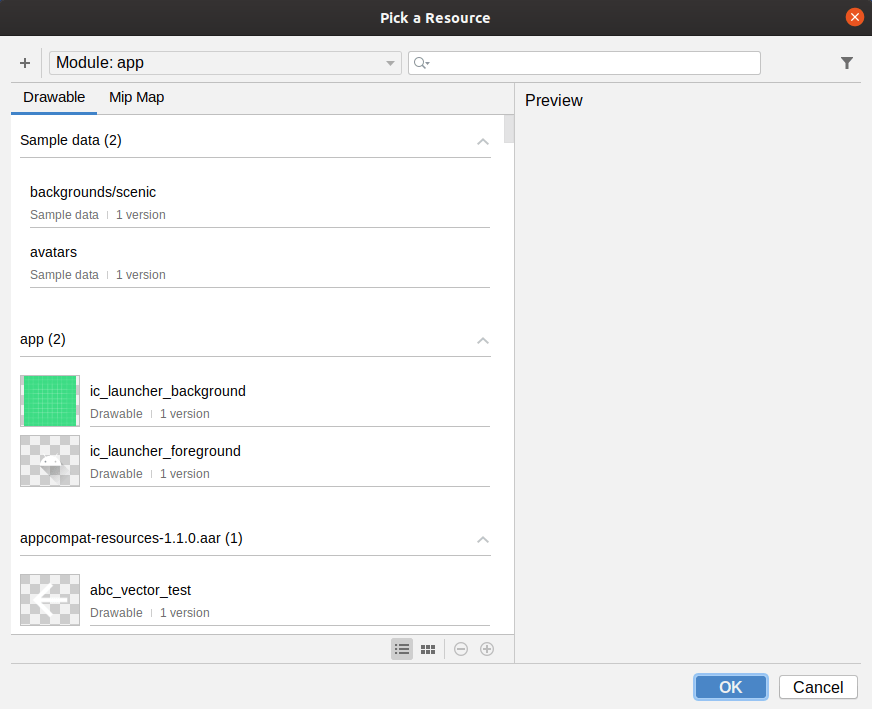
Unfortunately, you have no choice but to choose one of these, as due to some curious design decisions by Google, if you click Cancel to exit the dialog, it also abandons the entire drag-and-drop operation.
You can drag these into a layout file, then use the Attributes pane to set their attributes. Like all widgets, you will have an “id” option to set the android:id value for the widget. Two others of importance, though, are more unique to ImageView and ImageButton:
-
srcCompatallows you to choose a drawable resource to use as the image to be displayed, which will be filled in by whatever you chose in the resource dialog (note:srcalso works) -
contentDescriptionprovides the text that will be used to describe the image to users that have accessibility services enabled (e.g., TalkBack), such as visually impaired users
If you choose an image from the “Sample data” section in the resource dialog, instead of app:srcCompat, you get tools:srcCompat. This provides an image that you can use in the IDE, but that image will not be displayed at runtime. This is useful for cases where you want to supply the image from a URL or something else dynamic.
Reacting to Events
You can call setOnClickListener() on an ImageView or ImageButton to find out when the user clicks the widget and do something:
    binding.icon.setOnClickListener(v -> log(R.string.icon_clicked));
    binding.button.setOnClickListener(v -> log(R.string.button_clicked));
    binding.icon.setOnClickListener { log(R.string.icon_clicked) }
    binding.button.setOnClickListener { log(R.string.button_clicked) }
We will cover the log() function that both of those are using a bit later in this chapter.
Prev Table of Contents Next
This book is licensed under the Creative Commons Attribution-ShareAlike 4.0 International license.