The Emulator Sidebar
The free-standing emulator sports a “sidebar” that runs alongside the main emulator window:
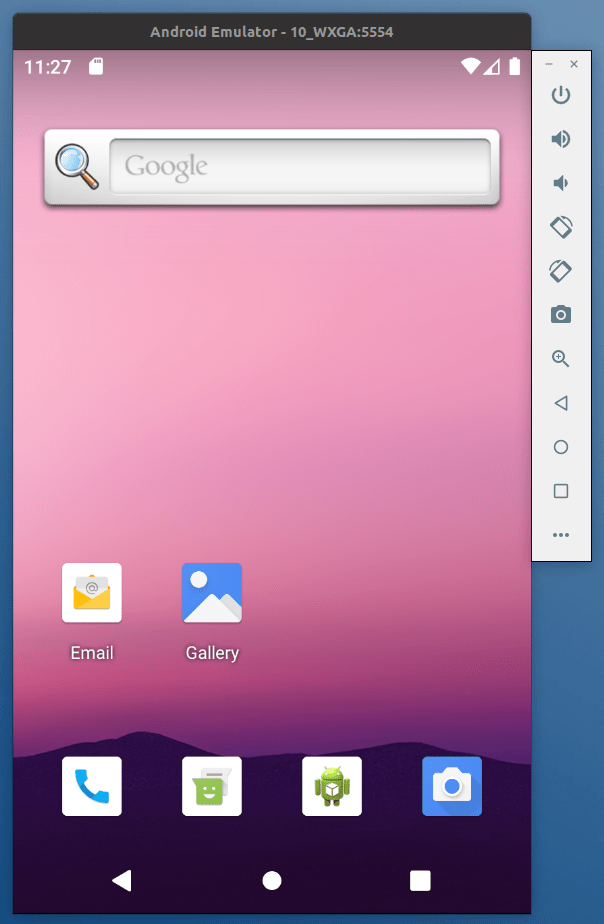
This provides you with rapid access to a number of emulator features and controls. Some of those are hidden behind the “More” button, at the bottom of the sidebar (looks like an ellipsis, “…”).
Note that the sidebar buttons have tooltips that will tell both the button’s purpose and the keyboard shortcut, if any, for that button.
If you click the “More” button, you will open up the “Extended Controls” window:
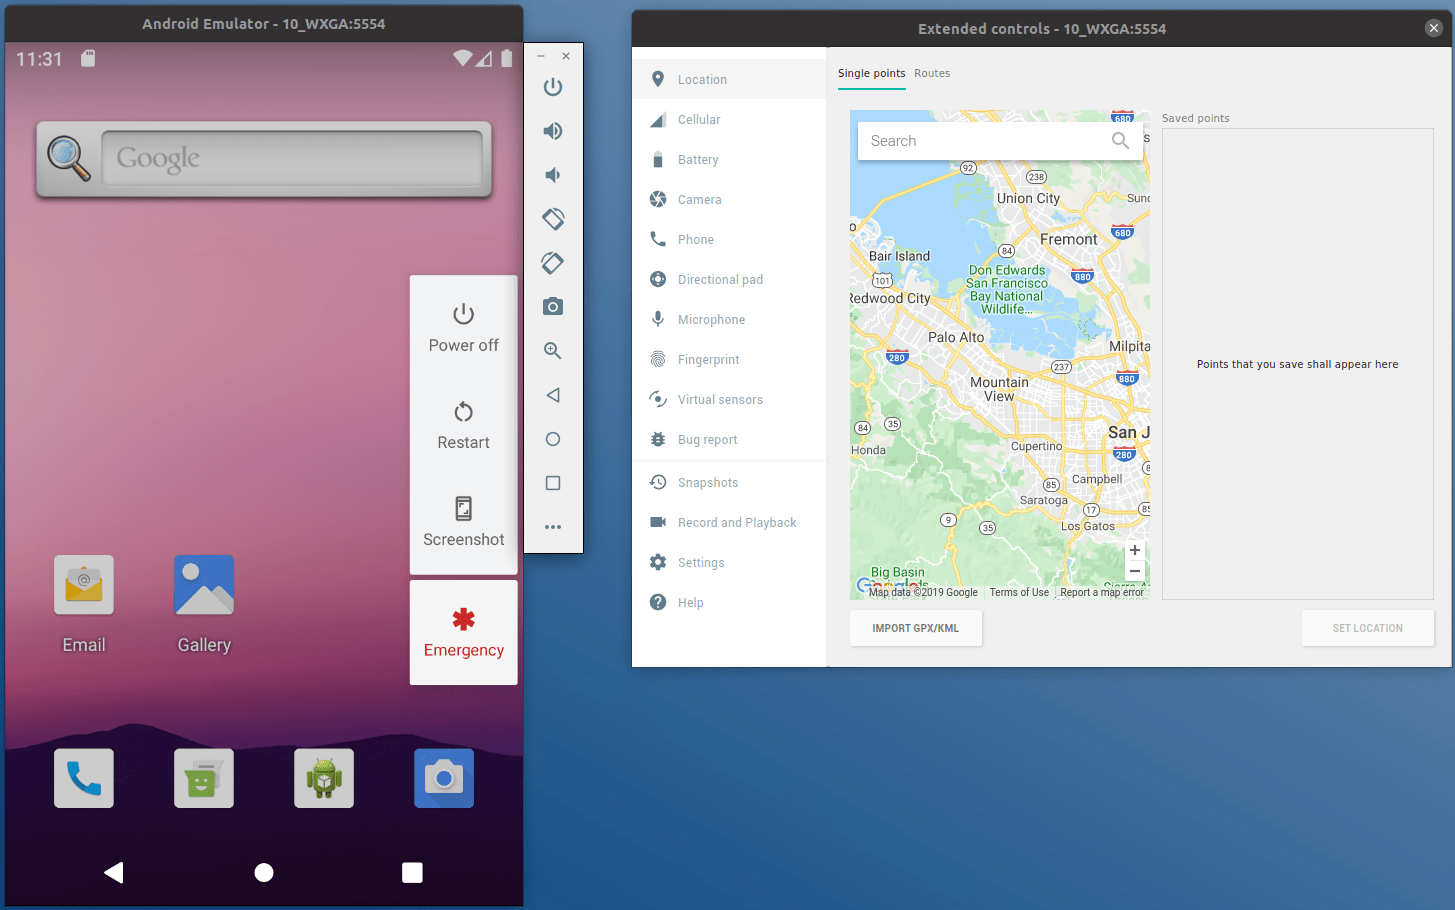
Some of the features are configured via this window.
Power and Navigation Controls
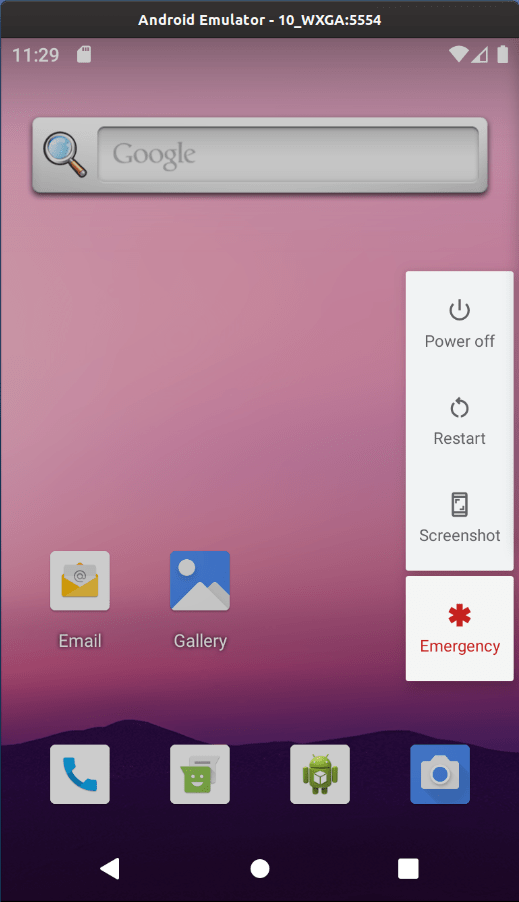
The top icon in the sidebar is a power button. A quick click on it will simulate putting your emulator to sleep; clicking it again will “wake it up”. A long-click will behave like the POWER button on an Android device, bringing up the power menu:
Towards the bottom of the sidebar are BACK, HOME, and RECENTS buttons for navigation:

Screen Orientation
Two buttons on the sidebar allow you to rotate the device clockwise or counter-clockwise:
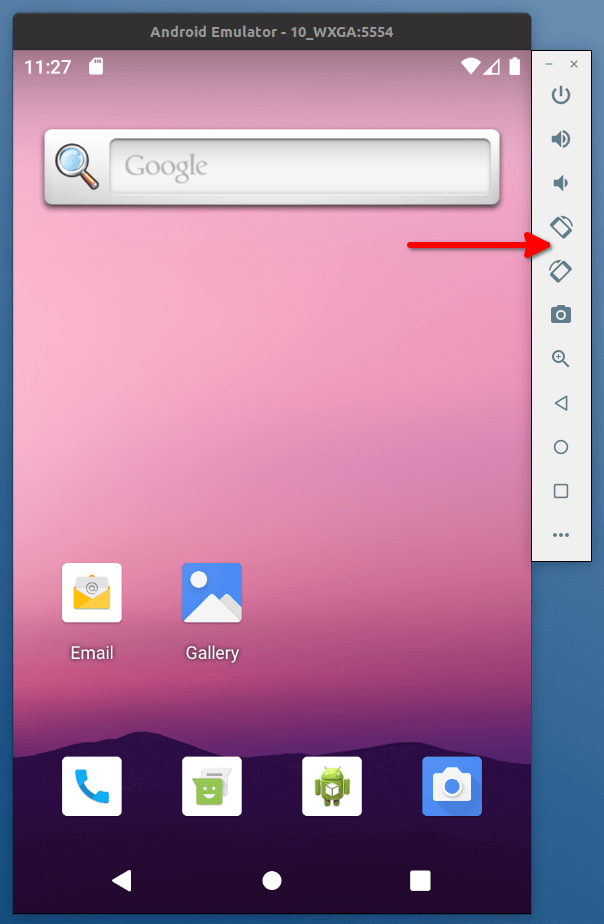
This allows you to rotate between all four portait and landscape orientations:

Screenshots
The camera button on the sidebar allows you to rapidly take screenshots of the emulator window:

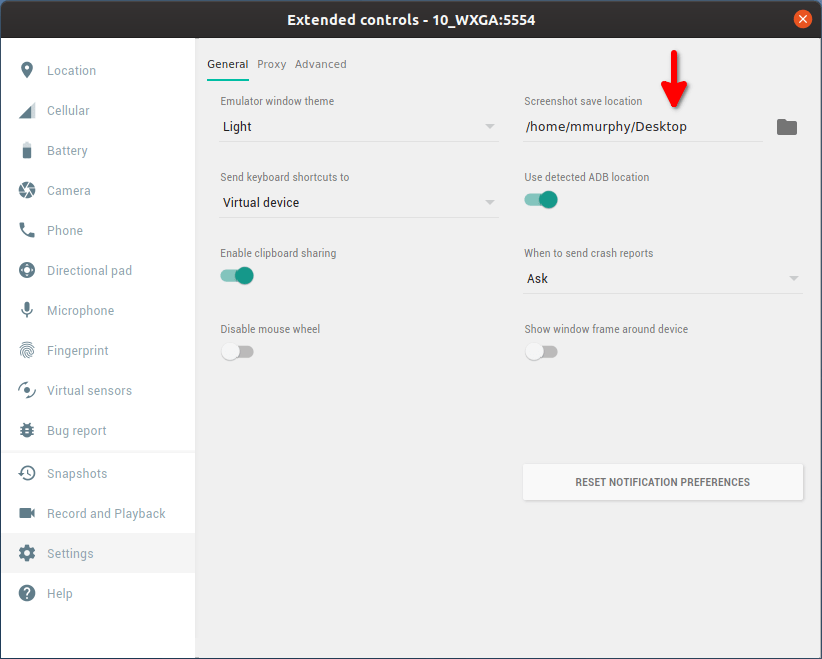
These will be stored in a directory controlled by the “Settings” category in the “Extended controls” window:
Faking the Real World
That “Extended controls” window also allows you to fake real world behavior in your emulator.
Location
The “Location” category lets you fake GPS fixes, if your app winds up using locations.
There are two tabs: “Single points” and “Routes”. As the names suggest, you use the “Single points” tab to set the emulator GPS to a specific point, and you use “Routes” to have the emulator play back a series of GPS fixes with time intervals between them.
For specifying points for GPS fixes, the emulator needs a latitude and longitude. Older versions of the emulator let you provide those values directly. Now, instead, you get a tiny Google Map and need to provide locations that way:
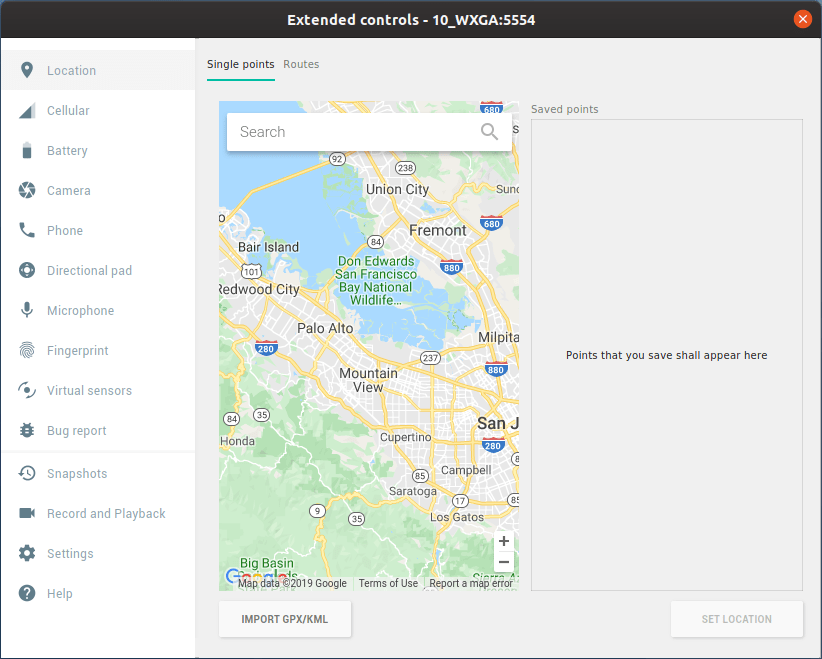
You can pan around the map by dragging it using your mouse, and you can zoom it using the +/- buttons. You can search for a location using the “Search” field, as you would on the Google Maps Web site or app.
A simple click will place a marker pin at the clicked point, showing you the address:
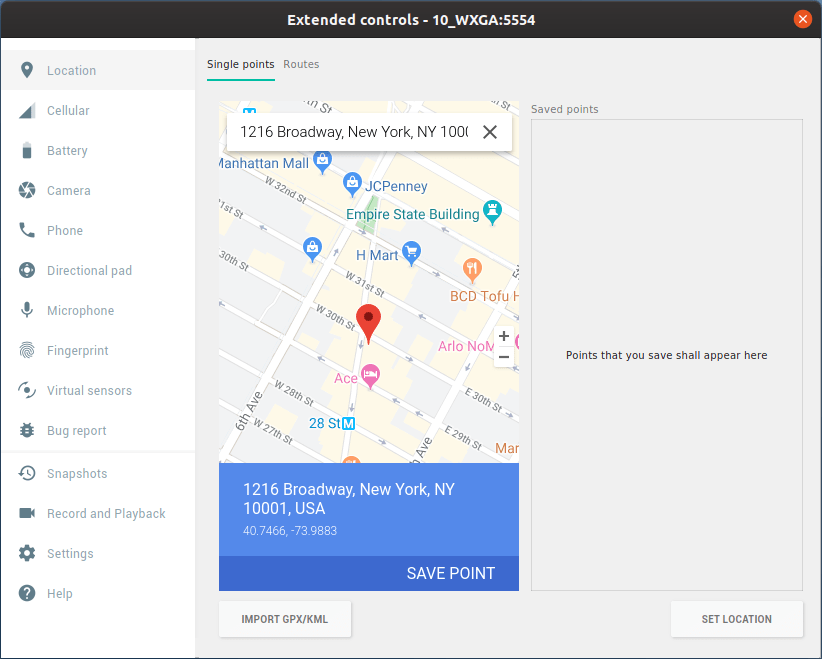
The “Set Location” button in the corner of the window will set the simulated GPS fix to that location. The “Save Point” option in the map window itself will add this location to a list of saved points to the side of the map, under a name that you provide:

Later, you can click on items in the list to move the map to that location, then click the “Set Location” button to send that GPS fix.
The “Routes” tab lets you build up a route from saved points. To start a route, you need to first save a point in the “Single points” tab, then choose “Start a Route” from the “…” drop-down menu. This will bring up a typical Google Maps navigation form, where you can specify start and end addresses:
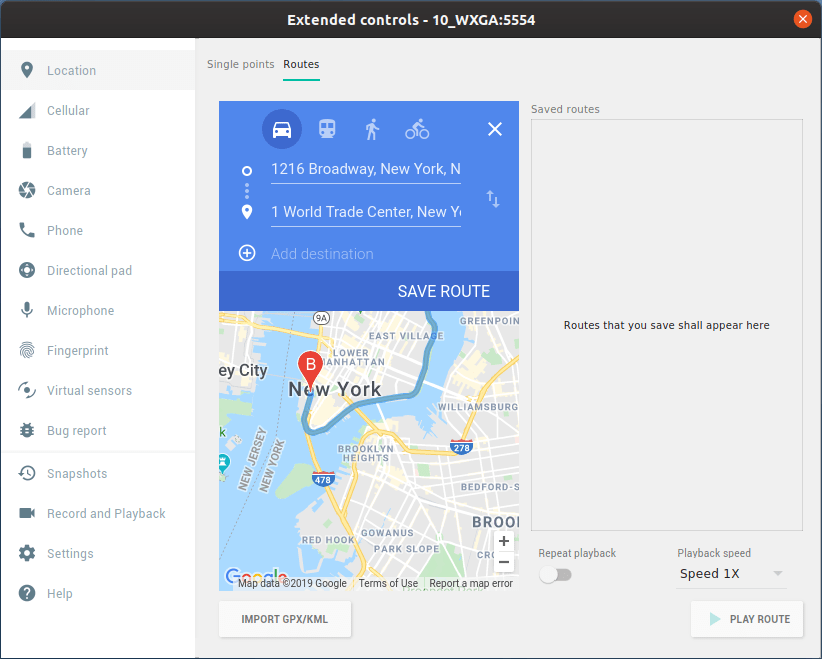
Clicking “Save Route” will save it to the list on the right:

The “Play Route” button will then simulate the device moving along the map-supplied route, using real-world speeds for that particular route. The “Playback speed” drop-down lets you speed up the playback, if you get bored waiting for NYC traffic.
If you have a route in GPX or KML format, you can import that using the “Import GPX/KML” button. This allows you to use more sophisticated off-emulator tools to build up your route.
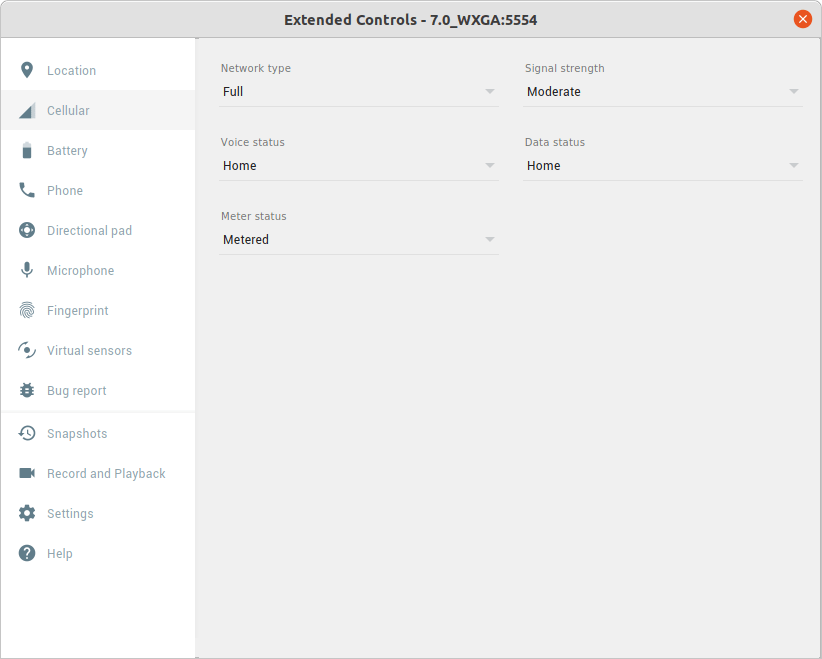
Network Status
The “Cellular” category controls how the emulator emulates its cellular network connection:
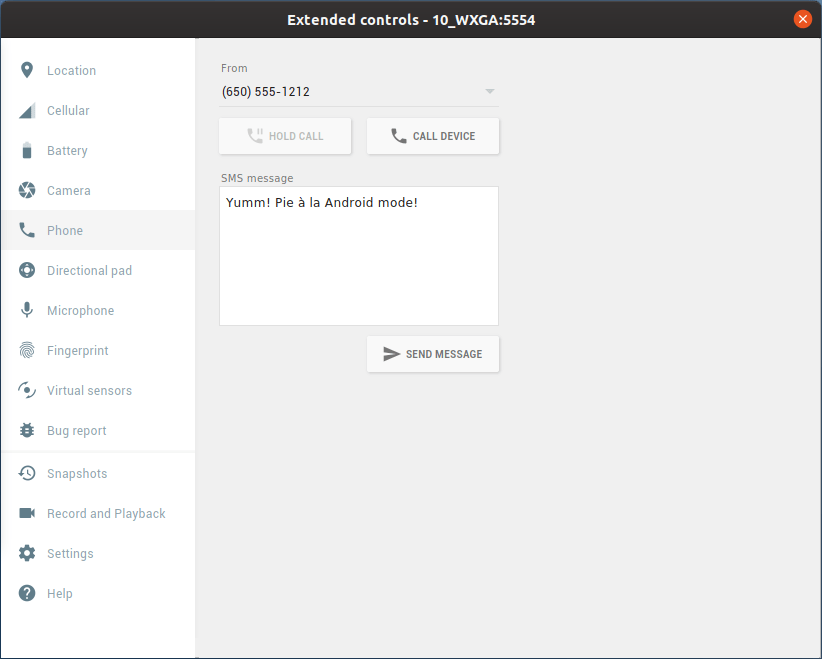
Telephony
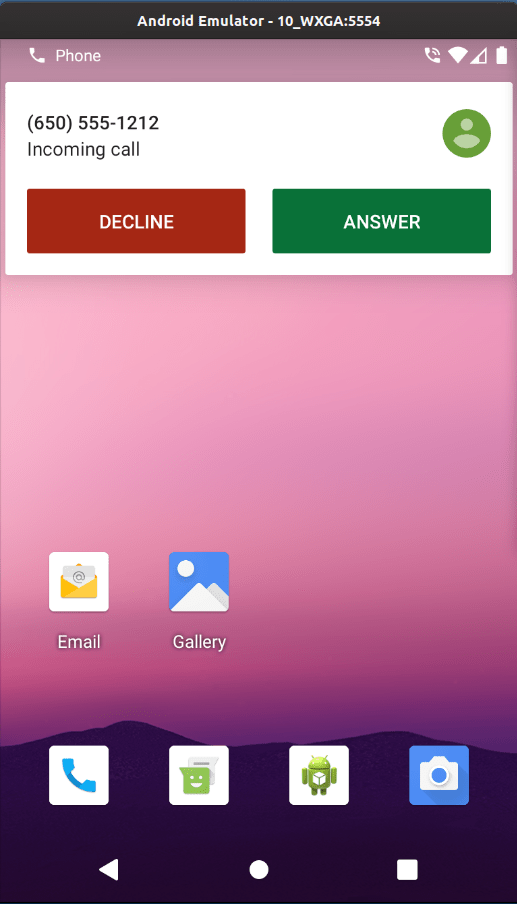
The “Phone” category allows you to simulate incoming phone calls and text messages:
These will trigger the corresponding apps on the emulator, based on registered Intent filters, such as responding to an incoming call:
Miscellanous Features
Additionally, you have:
- A “Battery” section allows you to simulate changes in the power status of the emulator
- A “Camera” section for controlling what the emulated camera shows, if it is not using a webcam
- A “Directional pad” section for simulating arrow keys and media buttons
- A “Microphone” section for controlling how the emulator simulates a headset, including whether your development machine’s microphone should be used as test input
- A “Fingerprint” section for simulating the user pressing their finger on a fingerprint sensor
- A “Virtual sensors” section for simulating rotating, shaking, twisting, or otherwise moving the device
- A “Bug report” section for submitting an issue to the Android issue tracker, based on emulator behavior
- A “Snapshots” section for you to save different versions of the emulator AVD, representing different device states
- A “Record and playback” section for recording screencasts and playing back a series of touch inputs
- A “Settings” section for controlling other aspects of the emulator behavior, such as where to save screenshots
- A “Help” section with a list of keyboard shortcuts, links to documentation, etc.
Prev Table of Contents Next
This book is licensed under the Creative Commons Attribution-ShareAlike 4.0 International license.