Activities and Results
startActivity() is asynchronous. The other activity will not show up until sometime later, particularly after you return from whatever callback you were in when you called startActivity() (e.g., onClick() of some View.OnClickListener).
Normally, this is not much of a problem. However, sometimes one activity might start another, where the first activity would like to know some “results” from the second. For example, the second activity might be some sort of “chooser”, to allow the user to pick a file or contact or song or something, and the first activity needs to know what the user chose. With startActivity() being asynchronous, it is clear that we are not going to get that sort of result as a return value from startActivity() itself.
To handle this scenario, there is a separate startActivityForResult() method. While it too is asynchronous, it allows the newly-started activity to supply a result (via a setResult() method) that is delivered to the original activity via an onActivityResult() method. Nowadays, though, Google prefers that we wrap these calls up using ActivityResultContracts, particularly for SDK-supplied “contracts” for common operations, such as picking a contact.
The ContactPicker sample module in the Sampler and SamplerJ projects demonstrates ActivityResultContracts.
The Scenario
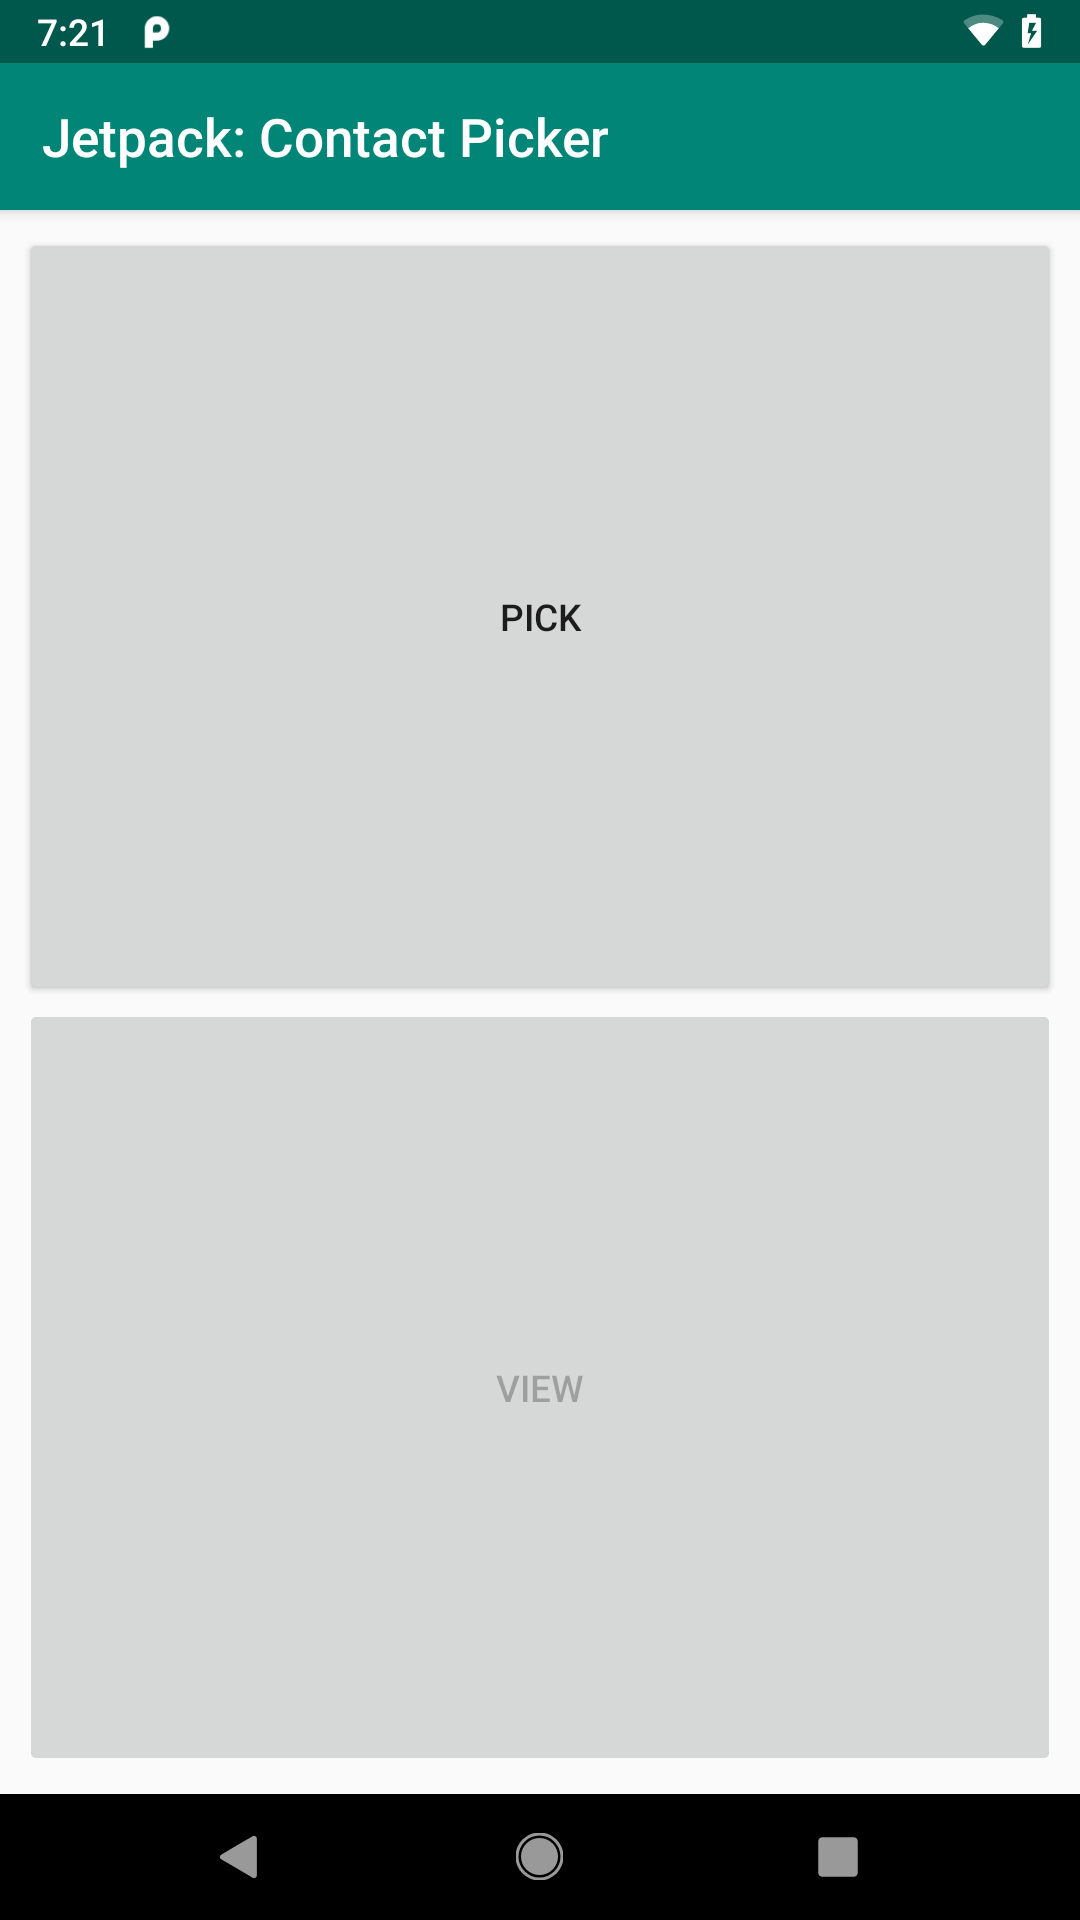
The MainActivity UI is pretty simple: two really big buttons, one labeled “Pick” and one labeled “View”. The business rules are:
- The “View” button should be disabled initially
- The “Pick” button, when clicked, should allow the user to pick a contact from the list of contacts on the device
- Once the user picks a contact, the “View” button should be enabled
- The “View” button, when clicked, should show the user details of that particular contact
There are two ways of going about implementing the pick-a-contact and view-a-contact logic:
- Write a UI ourselves. This is rather complex. In addition, it would require our app to have access to personally-identifying information (PII) about the user’s contacts. That requires us to ask for permission, and the user might not want to grant us permission, as letting us scan through their contacts may seem scary.
- We ask some other app — one that already knows how to work with contacts — to let the user pick a contact and view a contact. On many devices, there will be a built-in “Contacts” app that can do those things on our behalf.
ContactPicker takes the second approach.
The Layout
We have two editions of the activity_main layout resource. One is in the traditional res/layout/ directory, and it has two buttons:
<?xml version="1.0" encoding="utf-8"?>
<androidx.constraintlayout.widget.ConstraintLayout
  xmlns:android="http://schemas.android.com/apk/res/android"
  xmlns:app="http://schemas.android.com/apk/res-auto"
  android:layout_width="match_parent"
  android:layout_height="match_parent"
  android:padding="@dimen/container_padding">

  <Button
    android:id="@+id/pick"
    android:layout_width="0dp"
    android:layout_height="0dp"
    android:text="@string/pick_caption"
    app:layout_constraintEnd_toEndOf="parent"
    app:layout_constraintHeight_percent="0.5"
    app:layout_constraintStart_toStartOf="parent"
    app:layout_constraintTop_toTopOf="parent" />

  <Button
    android:id="@+id/view"
    android:layout_width="0dp"
    android:layout_height="0dp"
    android:enabled="false"
    android:text="@string/view_caption"
    app:layout_constraintBottom_toBottomOf="parent"
    app:layout_constraintEnd_toEndOf="parent"
    app:layout_constraintHeight_percent="0.5"
    app:layout_constraintStart_toStartOf="parent" />

</androidx.constraintlayout.widget.ConstraintLayout>The other is in res/layout-w640dp/, and it has two buttons:
<?xml version="1.0" encoding="utf-8"?>
<androidx.constraintlayout.widget.ConstraintLayout
  xmlns:android="http://schemas.android.com/apk/res/android"
  xmlns:app="http://schemas.android.com/apk/res-auto"
  android:layout_width="match_parent"
  android:layout_height="match_parent"
  android:padding="@dimen/container_padding">

  <Button
    android:id="@+id/pick"
    android:layout_width="0dp"
    android:layout_height="0dp"
    android:text="@string/pick_caption"
    app:layout_constraintBottom_toBottomOf="parent"
    app:layout_constraintStart_toStartOf="parent"
    app:layout_constraintTop_toTopOf="parent"
    app:layout_constraintWidth_percent="0.5" />

  <Button
    android:id="@+id/view"
    android:layout_width="0dp"
    android:layout_height="0dp"
    android:enabled="false"
    android:text="@string/view_caption"
    app:layout_constraintBottom_toBottomOf="parent"
    app:layout_constraintEnd_toEndOf="parent"
    app:layout_constraintTop_toTopOf="parent"
    app:layout_constraintWidth_percent="0.5" />

</androidx.constraintlayout.widget.ConstraintLayout>The difference is subtle, but the way we have the constraints set up, the res/layout/ edition of the layout has the two buttons be vertically stacked:

ContactPicker, Launched in Portrait Mode on a Phone
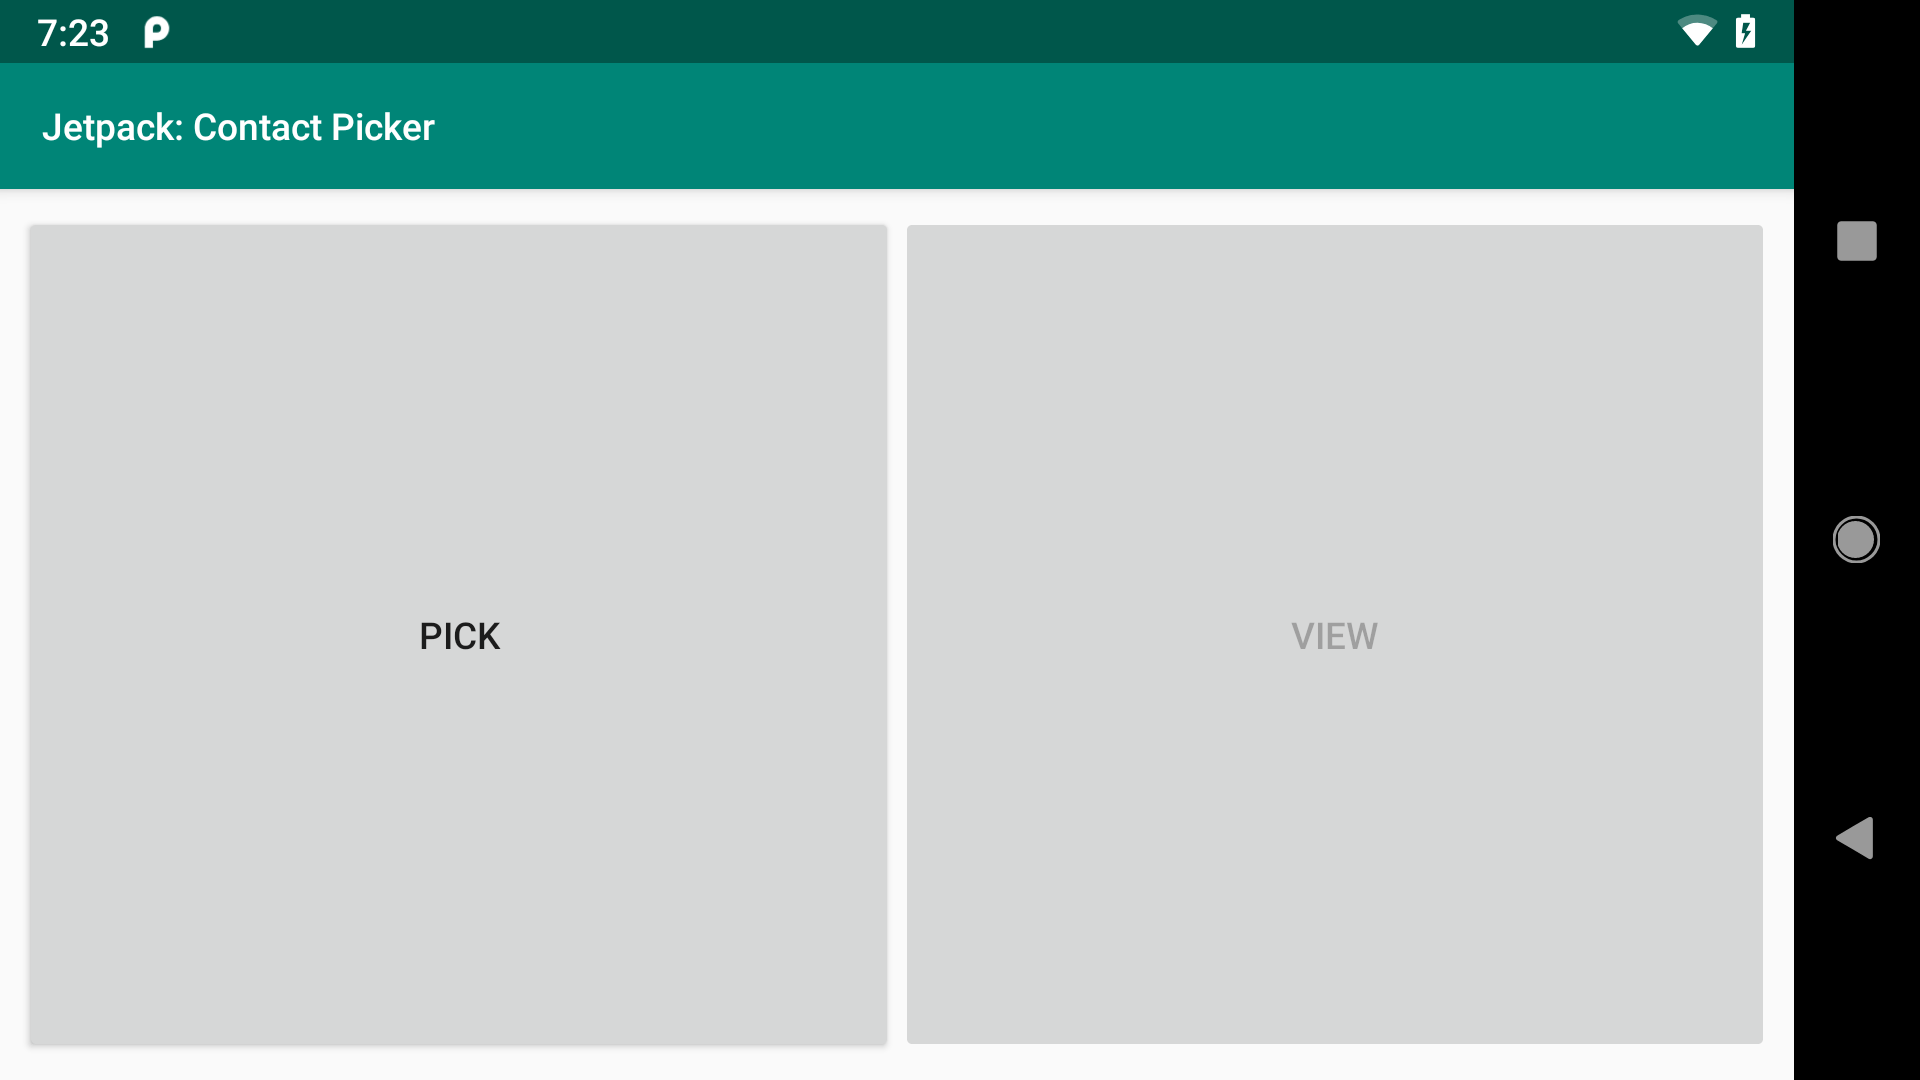
But, on devices with screens wider than 4", the res/layout-w640dp/ edition of the layout will be used, and it has the constraints set up for the buttons to be side-by-side:

ContactPicker, Launched in Landscape Mode on a Phone
Writing a Contract
The classic way to pick a contact was to use an ACTION_PICK implicit Intent with startActivityForResult(). The current pattern is to use registerForActivityResult() and ActivityResultContracts.PickContact:
  private final ActivityResultLauncher<Void> pickContact =
    registerForActivityResult(new ActivityResultContracts.PickContact(),
      new ActivityResultCallback<Uri>() {
        @Override
        public void onActivityResult(Uri uri) {
          vm.setContact(uri);
          updateViewButton();
        }
      });
  private val pickContact =
    registerForActivityResult(ActivityResultContracts.PickContact()) {
      vm.contact = it
      updateViewButton()
    }
registerForActivityResult() takes two parameters: an ActivityResultContract representing some startActivityForResult() call that should be made, and an ActivityResultCallback where we get the results returned by that other activity. The Jetpack includes several “ready-made” implementations of ActivityResultContract, mostly in ActivityResultContracts, such as ActivityResultContracts.PickContact for picking a contact.
Each ActivityResultContract stipulates what it needs for input and what it will deliver as the return value. For ActivityResultContracts.PickContact, it needs no input, and it will return a Uri object representing the selected contact. The callback will receive a Uri, and we need to do something with it. We will explore exactly what we are doing in the callback in an upcoming section.
Note that registerForActivityResult() does not actually make the request to allow the user to pick a contact. Rather, it sets up an object that we can use later to make that request, and it sets up what we will do with the results (via the callback).
Picking a Contact
In MainActivity, we set up a View.OnClickListener for the pick button, to allow the user to pick a contact. There, all we do is call launch() on our pickContact object:
binding.pick.setOnClickListener(v -> pickContact.launch(null));
binding.pick.setOnClickListener { pickContact.launch(null) }
launch() says “go do whatever it is that we configured you to do”. In some cases, we will pass parameters to launch() to configure the request — we will see examples of this later in the book. ActivityResultContracts.PickContact does not require input, so we pass null to launch().
Under the covers, launch() will trigger a call to startActivityForResult(). In this case, it will start an activity, from the user’s contacts app, to allow the user to pick a contact from their list of available contacts.
Getting and Retaining the Contact
The user could use system BACK navigation to exit out of that pick-a-contact activity. In that case, nothing happens in our app.
If, on the other hand, the user chooses a contact, our callback will get control to react to that result. And, in this case, the callback will receive a Uri representing the chosen contact. If we got a contact Uri, we do two things.
First, we update a ContactViewModel that is serving as the viewmodel for this activity:
package com.commonsware.jetpack.samplerj.contact;

import android.net.Uri;
import androidx.lifecycle.SavedStateHandle;
import androidx.lifecycle.ViewModel;

public class ContactViewModel extends ViewModel {
  private static final String STATE_CONTACT = "contact";
  private final SavedStateHandle state;
  private Uri contact;

  public ContactViewModel(SavedStateHandle state) {
    this.state = state;
    contact = state.get(STATE_CONTACT);
  }

  Uri getContact() {
    return contact;
  }

  void setContact(Uri contact) {
    this.contact = contact;
    state.set(STATE_CONTACT, contact);
  }
}
package com.commonsware.jetpack.sampler.contact

import android.net.Uri
import androidx.lifecycle.SavedStateHandle
import androidx.lifecycle.ViewModel

private const val STATE_CONTACT = "contact"

class ContactViewModel(private val state: SavedStateHandle) : ViewModel() {
  var contact: Uri? = state[STATE_CONTACT]
    set(value) {
      field = value
      state.set(STATE_CONTACT, value)
    }
}
We also call an updateViewButton() function that marks the view button as being enabled if we happen to have a contact now:
  private void updateViewButton() {
    if (vm.getContact() != null) {
      binding.view.setEnabled(true);
    }
  }
  private fun updateViewButton() {
    if (vm.contact != null) {
      binding.view.isEnabled = true
    }
  }
In addition, we call updateViewButton() in onCreate(), after getting our ContactViewModel, so we update the view button to be enabled after a configuration change, if appropriate:
  @Override
  protected void onCreate(Bundle savedInstanceState) {
    super.onCreate(savedInstanceState);

    binding = ActivityMainBinding.inflate(getLayoutInflater());
    setContentView(binding.getRoot());

    vm = new ViewModelProvider(this).get(ContactViewModel.class);

    updateViewButton();
  override fun onCreate(savedInstanceState: Bundle?) {
    super.onCreate(savedInstanceState)

    binding = ActivityMainBinding.inflate(layoutInflater)
    setContentView(binding.root)

    updateViewButton()
So, the net is that once the user picks the contact, the view button becomes enabled, and we hold onto the contact Uri across configuration changes, so we do not lose track of who the user picked.
Viewing the Contact
Our View.OnClickListener for the view button wraps our contact Uri in an ACTION_VIEW Intent and tries to start an activity to view that contact:
    binding.view.setOnClickListener(
      v -> {
        try {
          startActivity(new Intent(Intent.ACTION_VIEW, vm.getContact()));
        }
        catch (Exception e) {
          Toast.makeText(this, R.string.msg_view_error,
            Toast.LENGTH_LONG).show();
        }
      });
    binding.view.setOnClickListener {
      try {
        startActivity(Intent(Intent.ACTION_VIEW, vm.contact))
      } catch (e: Exception) {
        Toast.makeText(this, R.string.msg_view_error, Toast.LENGTH_LONG).show()
      }
    }
It is theoretically possible that there is no activity to allow the user to view one of their contacts. In practice, that should not be a problem — if the user can pick a contact, they almost certainly can view a contact. However, to be safe, we wrap our startActivity() call in a try/catch block to deal with any possible exceptions. In particular, if there is no activity to handle a particular startActivity() (or startActivityForResult()) call, Android will throw an ActivityNotFoundException, which we would catch.
If you run this on a device or emulator that has a working “contacts” app with 1+ contacts in it, clicking the “Pick” button lets you pick a contact, and then clicking the “View” button views details of the picked contact. In both cases, the contacts app is supplying the UI for picking and viewing contacts.
Prev Table of Contents Next
This book is licensed under the Creative Commons Attribution-ShareAlike 4.0 International license.