Step #5: Defining an Item
Next, we will add a low-priority action item, for an “about” screen.
Right click over the res/ directory in your project, and choose New > “Android Resource Directory” from the context menu. This will bring up a dialog to let you create a new resource directory:
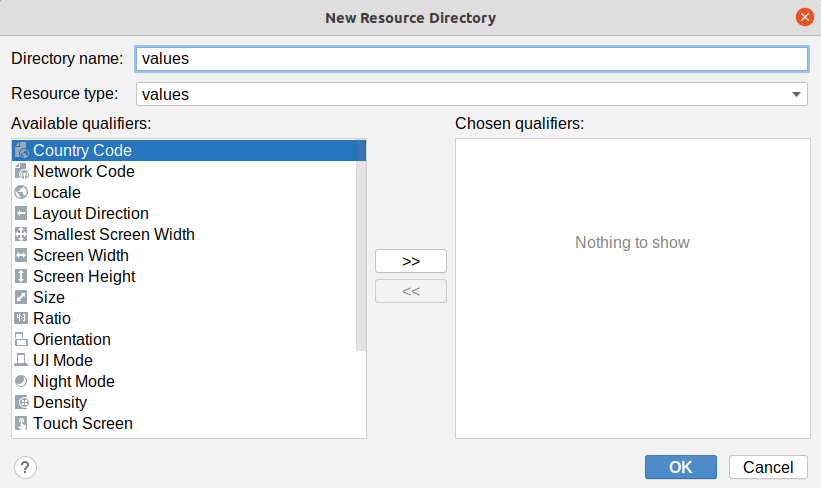
Change the “Resource type” drop-down to be “menu”, then click “OK” to create the directory.
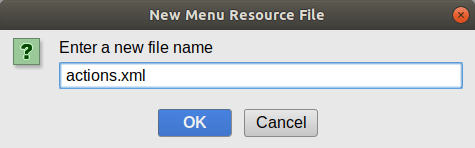
Then, right-click over your new res/menu/ directory and choose New > “Menu Resource File” from the context menu. Fill in actions.xml in the “New Menu Resource File” dialog:
Then click “OK” to create the file. It will open up into a menu editor. As with the layout editor, there are modes that you can toggle via icons in the tab itself:

As with the layout designer, the “Code” button shows you the XML of this resource, while the “Design” button gives you a graphical menu designer:
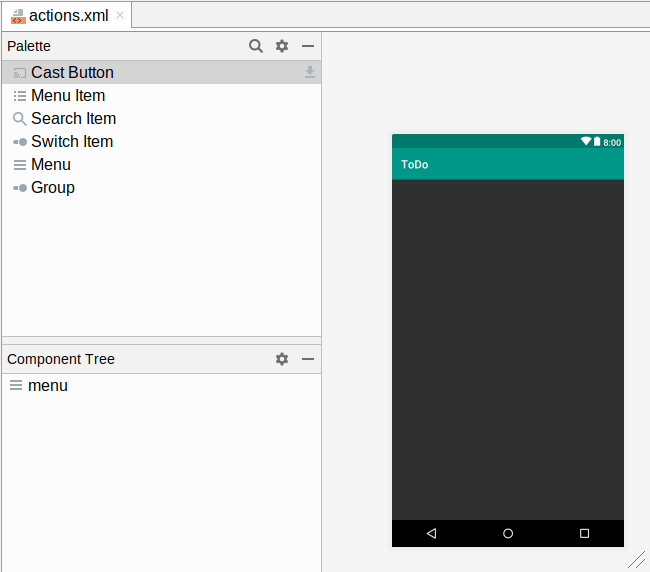
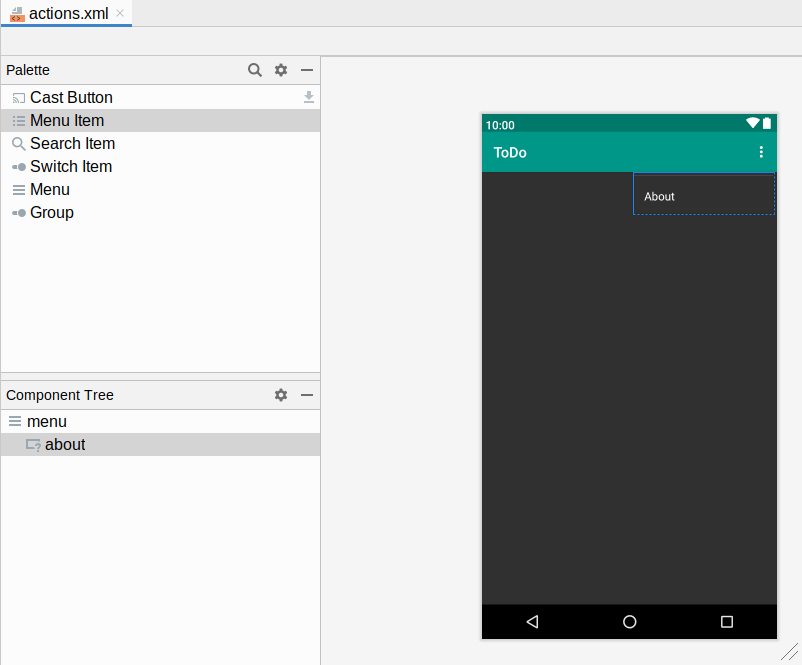
This editor looks and works a lot like the layout editor. The “Palette” contains things that can be dragged-and-dropped into the menu. The “Component Tree” shows the current contents of the menu. The preview area shows visually what this looks like, and the “Attributes” pane (not shown in the above screenshot) shows attributes of the selected item in the “Component Tree”.
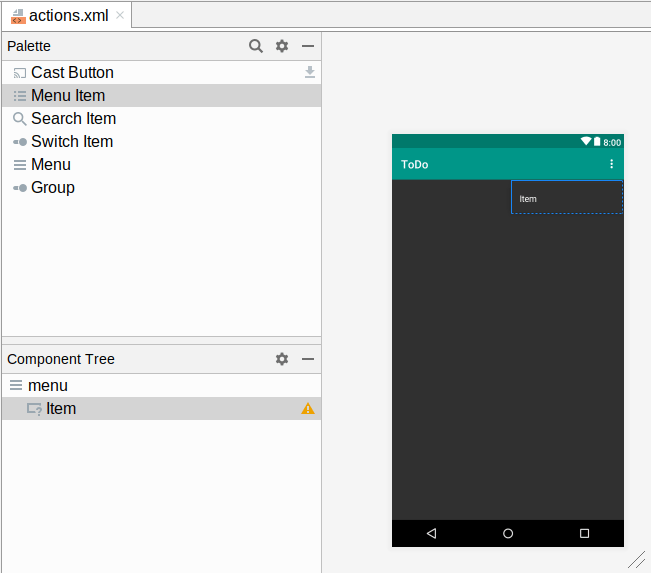
In the “Palette” view, drag a “Menu Item” into the preview area over the right end of the app bar. This will appear as an item in an overflow area:
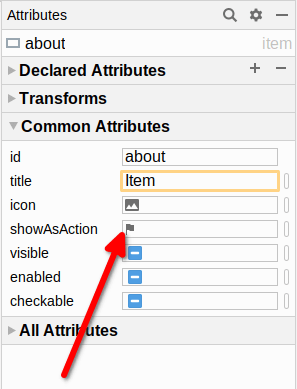
In the Attributes pane, fill in about for the “id”.
Next, we want to set the “showAsAction” value to never. To do this, click the little flag icon in the “showAsAction” field:
That will fold open a list of available choices:

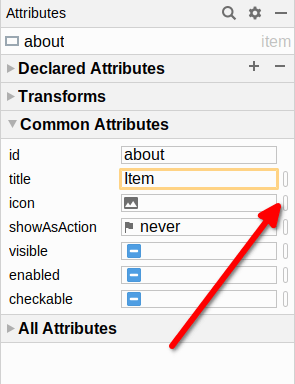
Check the “never” checkbox in the list, then click the “Apply” button in the drop-down to close it and set “showAsAction” to never.
Then, click on the “O” button next to the “icon” field:
This will bring up a drawable resource selector:
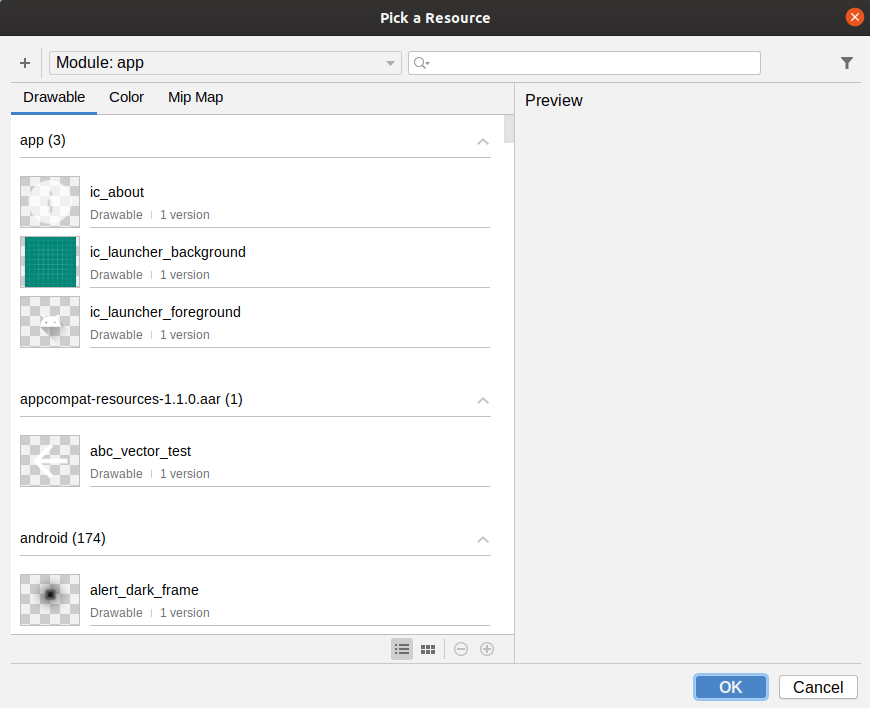
Click on ic_about in the list of drawables, then click “OK” to accept that choice of icon. In truth, this is unnecessary, as our item should never show the icon. But, you never know when someday Google will decide to show icons for overflow menu items, so it is best to define one.
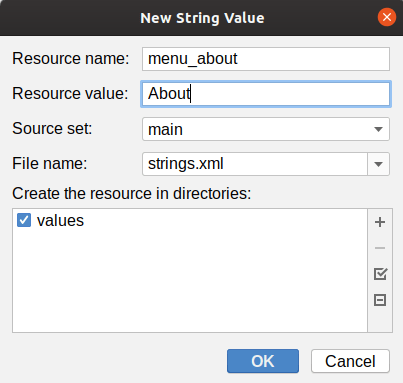
Then, click the “O” button next to the “title” field. As before, this brings up a string resource selector. Click on the “+” icon, followed by “String Value” in the resulting drop-down list. This will bring up a new string resource dialog. In the dialog, fill in menu_about as the resource name and “About” as the resource value:
Click “OK” to close each dialog, and you will see your new title appear in the menu editor:
Prev Table of Contents Next
This book is licensed under the Creative Commons Attribution-ShareAlike 4.0 International license.