Step #2: Moving Our Classes
From here, it is a matter of dragging our classes from where they are to the desired package. Android Studio will take care of fixing up any import statements, view binding references, the manifest, and related stuff.
Start by dragging ToDoRepository to the repo package. When you drop the class in the repo package, a “Move” dialog will appear:
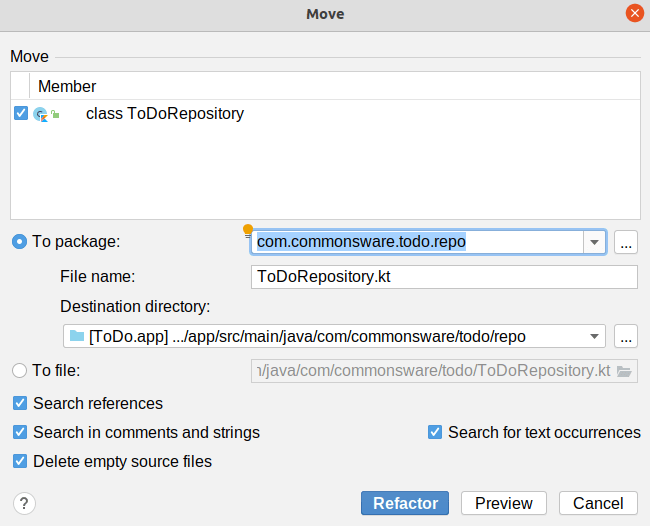
This confirms that we are going to move this class to the designated package. The checkboxes towards the bottom of the dialog indicate where Android Studio will look for this class, in order to change that code to point to the new package (if needed).
Click “Refactor”, and in a moment, your class will now be in the repo package.
Then, move most of the remaining classes to the new packages:
| Class(es) | Package |
|---|---|
ToDoModel |
repo |
AboutActivity, MainActivity, SingleModelMotor |
ui |
RosterAdapter, RosterListFragment, RosterMotor, RosterRowHolder |
roster |
DisplayFragment |
display |
EditFragment |
edit |
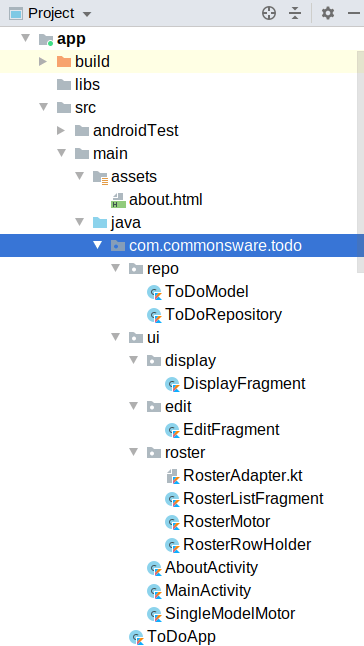
In the end, only ToDoApp should be directly in com.commonsware.todo, with everything else in one of the sub-packages off of com.commonsware.todo.
You may find Android Studio showing a bunch of red errors in the editors for your fragments. If that happens, choose “File” > “Sync Project with Gradle Files” from the main menu, and that may clear up the problem.
Prev Table of Contents Next
This book is licensed under the Creative Commons Attribution-ShareAlike 4.0 International license.