Saving an Item
Having the EditFragment is nice, but we are not saving the changes anywhere. As soon as we leave the fragment, the “edits” vanish.
This is not ideal.
So, in this tutorial, we will allow the user to save their changes, by clicking a suitable app bar item.
This is a continuation of the work we did in the previous tutorial. The book’s GitLab repository contains the results of the previous tutorial as well as the results of completing the work in this tutorial.
Step #1: Adding the App Bar Item
First, let’s set up the Save app bar item.
Right-click over res/drawable/ in the project tree and choose “New” > “Vector Asset” from the context menu. This brings up the Vector Asset Wizard. There, click the “Clip Art” button and search for save:
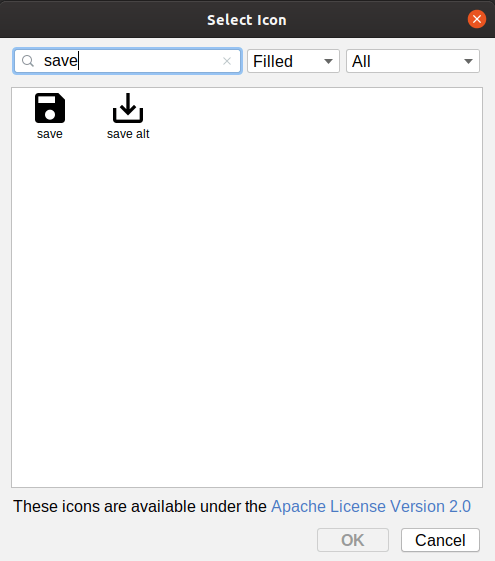
Choose the “save” icon and click “OK” to close up the icon selector. Change the name of the icon to ic_save. Then, click “Next” and “Finish” to close up the wizard and set up our icon.
If the icon selector did not open, that may be due to this Arctic Fox bug. Instead, just close up the Vector Asset wizard, and download this file into res/drawable instead. That is the desired icon, already set up for you.
Then, right-click over the res/menu/ directory and choose New > “Menu resource file” from the context menu. Fill in actions_edit.xml in the “New Menu Resource File” dialog, then click OK to create the file and open it in the menu editor.
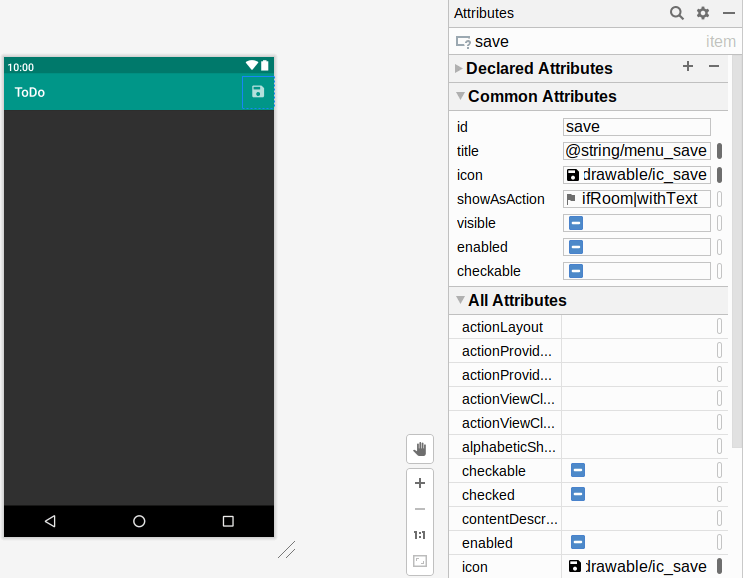
In the Palette, drag a “Menu Item” into the preview area. This will appear as an item in an overflow area as before.
In the Attributes pane, fill in save for the “id”. Then, choose both “ifRoom” and “withText” for the “showAsAction” option. Next, click on the “O” button next to the “icon” field. This will bring up an drawable resource selector — click on ic_save in the list of drawables, then click OK to accept that choice of icon.
Then, click the “O” button next to the “title” field. As before, this brings up a string resource selector. Click on “+”, then click on “String Value” in the resulting drop-down. In the dialog, fill in menu_save as the resource name and “Save” as the resource value. Click OK to close the dialog, to complete our work on setting up the app bar item:
We also need to take steps to arrange to show this app bar item on EditFragment, as we did with DisplayFragment for the “edit” item.
Add this onCreate() function to EditFragment, to indicate that this fragment wishes to participate in the app bar:
  override fun onCreate(savedInstanceState: Bundle?) {
    super.onCreate(savedInstanceState)

    setHasOptionsMenu(true)
  }
Next, add this onCreateOptionsMenu() function to EditFragment, to inflate our newly-created menu resource:
  override fun onCreateOptionsMenu(menu: Menu, inflater: MenuInflater) {
    inflater.inflate(R.menu.actions_edit, menu)

    super.onCreateOptionsMenu(menu, inflater)
  }
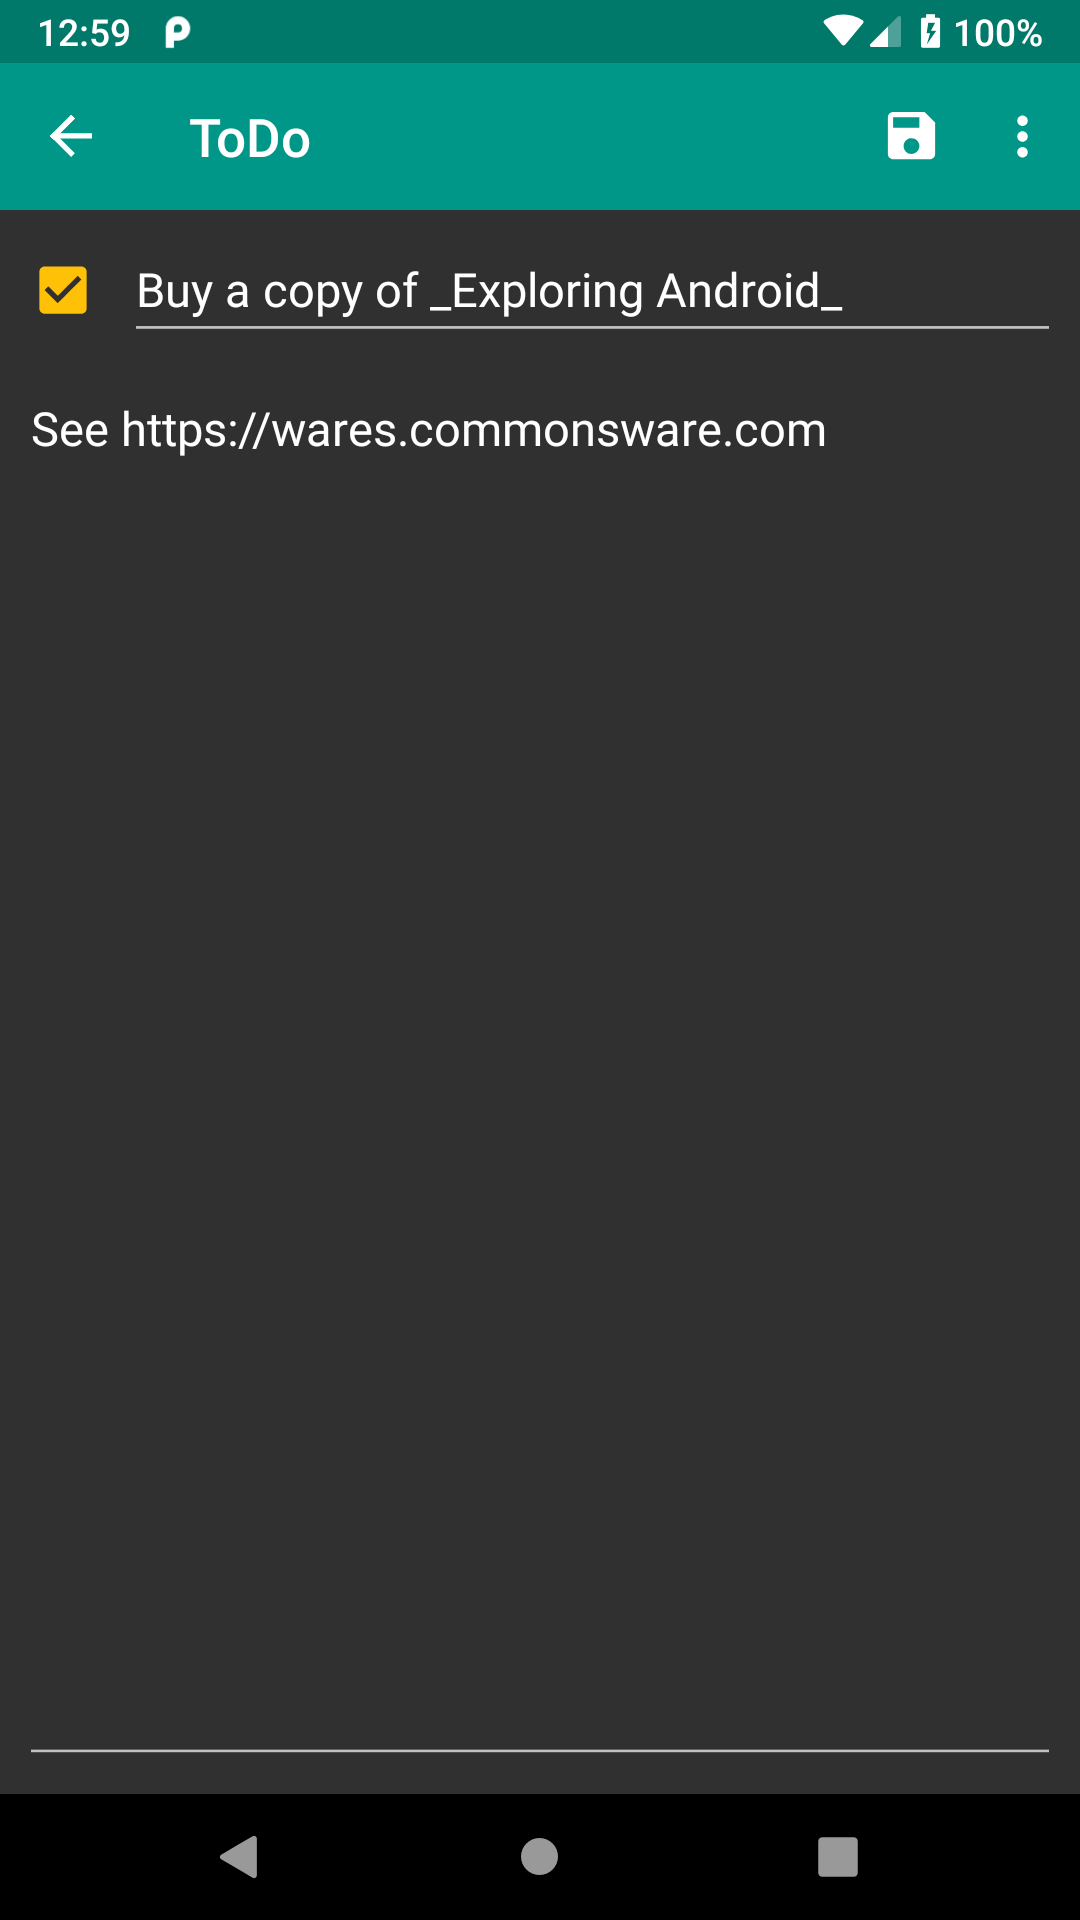
If you run the app and edit a to-do item, you should see the new app bar item on the EditFragment:
Prev Table of Contents Next
This book is licensed under the Creative Commons Attribution-ShareAlike 4.0 International license.